🚀 Elevate Your Creations with Precision and Speed!
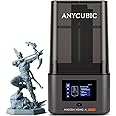
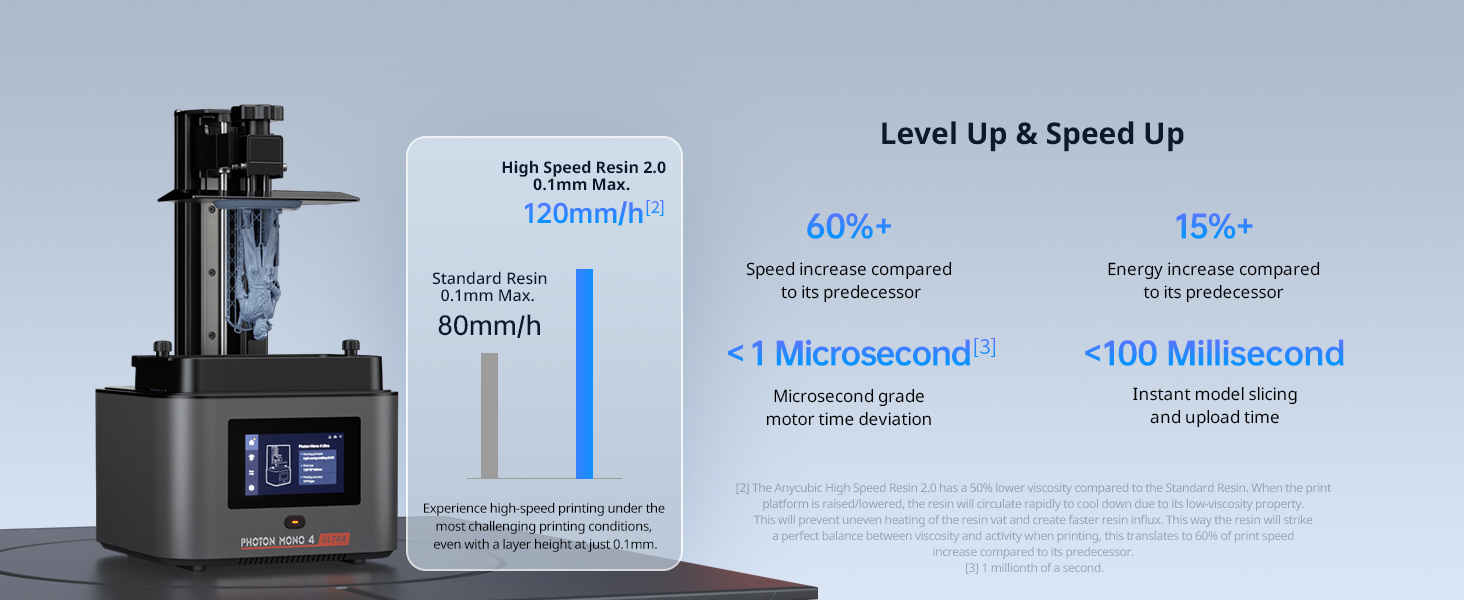
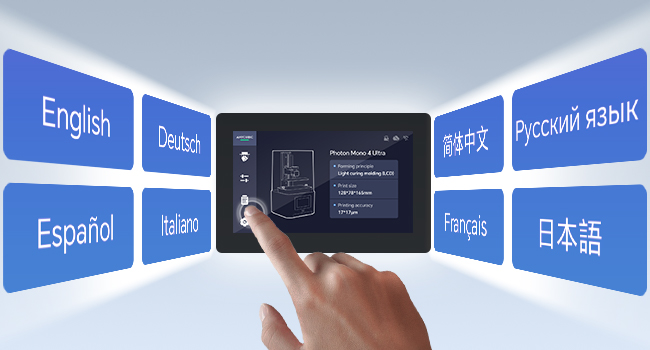
The ANYCUBIC Photon Mono 4 Ultra is a cutting-edge resin 3D printer featuring a 7” 10K LCD screen, capable of printing at speeds up to 120mm/h. With advanced COB light source technology and a user-friendly HD touchscreen interface, it offers unparalleled detail and ease of use, making it the perfect choice for professionals and enthusiasts alike.


M**L
Amazing detail, amazingly easy
Bought for £260, delivered by Amazon prime.I love this printer. I’m not new to 3D printing. I’ve used and abused a Creality CR-10 for some time- it’s so heavily modified now it’s something else entirely. I used to use a friend’s DaVinci 1.0 AIO, and I’ve spent longer than I should on my local hacklab’s delta machine. I’m happy to report this is nothing like any FFF printer I’ve ever used.Why? Because it just bloody works. You slice the stl, put it on a USB stick, and you hit play. You don’t have to check on it every fifteen minutes to make sure it’s not reverted to a spaghetti gun, you don’t have to worry the bridges are going to come out saggy or the nozzle’s going to block. You just wait for it to beep and wash your model off. The detail and precision you can achieve is astounding, particularly when you compare it side by side to FFF. I’ve had success printing tiny mechanical parts, and gears I designed with 0.7 module worked first time.It’s not zero setup, but it’s pretty minimal. It comes assembled, and it’s a nice set-contained unit that’s surprisingly small. You just need to level the bed and run the test print. Between parts you need to check the FEP is clear before your next print, which I do by using the plastic spatula. Post-processing requires washing the parts in IPA to clear off the unused resin, which I suggest is best done using a series (two or three) of IPA baths (pickle jars) in a constant sequence. Then you leave them in the sun to harden properly.It’s not perfect, and sometimes parts’ll get stuck to the FEP or come loose from the bed, but it’s much less fiddly to make the process work than FFF. Most problems I’ve had related to exposure times (if it’s too short your parts won’t stick to the supports properly), or model and support placement. But it’s surprisingly forgiving, and at least when it fails the bits stuck on the FEP stop any further plastic being deposited on the broken areas so you don’t waste anything but time.The one thing that put me off resin printers for a long time (well, apart from the cost) is the resin. It’s not benign stuff, and it’s expensive. But anycubic’s resin is only about £40/kg, and while that’s about twice the price of FFF plastic, it’s not a huge problem particularly considering that these machines really excel at printing small parts rather than furniture. With regards to chemical safety, you should never let the uncured resin contact your skin (it’s an irritant and a sensitiser), and it can apparently smell a bit although I’m not sure about the health effects of the fumes. I haven’t noticed much smell from Anycubic Green, although I run the printer in an unoccupied room with the windows open. You should respect the chemicals, and always wear gloves and eye protection when working with them, but I find I only rarely have to do more than pour a little more into the vat.
J**.
The perfect introduction to 3D printing, delivering excellent results
Setting up the Photon was simple, following instructions which are clear and concise; the only assembly required is the door knob, and all the required core tools and accessories come with it. There is a learning curve to getting the machine functioning properly – which can seem intimidating – but once the basic steps are put in place, you'll have amazing prints time after time. With some testing you can rapidly get how to set up your models to print optimally, in terms of time, quality and resin use.To start with, environment. Temperature seems critical. The warmer the better. My first error was placing the Photon in a heavily ventilated but very cold utility room: I just couldn't get any prints to work when I first received the machine at the beginning of the year, and parked it during a busy period. With the last month's enforced isolation coinciding with unseasonably warmer weather in the UK, I relocated and haven't looked back. Secondarily, obviously a stable and level surface. Have windows open: I haven't experienced particularly bad odours, but it's just safer – and nicer for anyone else in the house!Next, set-up. Levelling the build plate is where a lot of people seem to go wrong, but having checked out many online guides the one that works every time is this:1: Put a sheet of paper over the screen.2: Lower the build plate in 10mm increments so it's close to the screen, before switching to 1mm to bring it within a couple of mm. Switch to 0.1 and bring the plate down in increments, sliding the paper in and out until you can't slide the paper back without it crinkling.3: The crucial added part: lightly hold the build plate evenly with one hand and tighten the screw with the other. Then raise the plate by a couple of mm and repeat the process.4: Back out of the menu system and hit the Z=0 button to set the correct minimum level height. Retract the plate in 10mm increments so you can get printing.Tightening the plate can sometimes make it retract a fraction, which is why you have to repeat the levelling process again. Don't miss this step! There are plenty of online videos to help show you the process. It takes seconds, and saves wasted hours and resin.Prints: PPE appropriate to our current situation is necessary. Gloves and a mask to be safe. Shake your resin well, then pour into the vat. Select your print from a USB stick and you're good to go. The results are just great, which takes us to the next learning step: slicing and structures.The included software is fine, although Chitubox is a popular alternative. They all work the same way, and don't require overt software knowledge to use. Import your STL file and orient it on the print bed for optimum printing. Simpler objects (walls, accessories) can print 'normally', level with the print bed. Figures, which the Photon excels at, can be typically orientated at 45° to avoid overt build lines being visible at lower print resolutions, but it's not always necessary.However, I would always use a support structure with raft, no matter what, and that's where some trial and error comes in: there is no 'right' answer to that, as it depends on the model. Start using the automatic support structure functions to learn what does and doesn't work (which will likely be the former for a lot of things). Then start building your own supports, which is as simple as selecting the type (light, which have tiny contact points ideal for figures, medium or heavy) and clicking where you want the contact point. Again, there are lots of guides for settings to use, but common sense works here, and Chitubox in particular highlights weak areas in red.If you print any larger objects then use the auto-hollowing tool (in Chitubox) and slice with infill turned on. It will turn a massive lump of money-wasting resin into a strong, light and efficient print. Slicing is another easy part, where the software does the heavy lifting; you just need to remember to use the settings correct for your resin type and model (does it need infill, basically). There's a great online spreadsheet for resin settings available on the Anycubic Photon Reddit channel and also the Facebook groupSo, I couldn't be happier with my Photon. My house is quickly filling up with an insane amount of prints, as the unstoppable excitement of 'what can I print next' takes over! Learn the process, experiment and expect some mistakes, follow the correct steps each time and you will see this printer shine. I've stuck at 0.05mm resolution, and I've never been disappointed, but the printer can print at double that res for even more detail (at the cost of print time). It's just an excellent tool that opens up a world of possibilities.
Trustpilot
2 days ago
2 months ago