Sobre nosotros
Servicios al cliente
Atención al cliente
Acceso Regional
Legales y políticas
Obtén la aplicación

Apunta tu cámara para descargar la aplicación
Copyright © 2024 Desertcart Holdings Limited
🌱 Composting Made Chic: Join the Green Revolution!
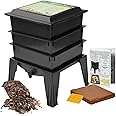
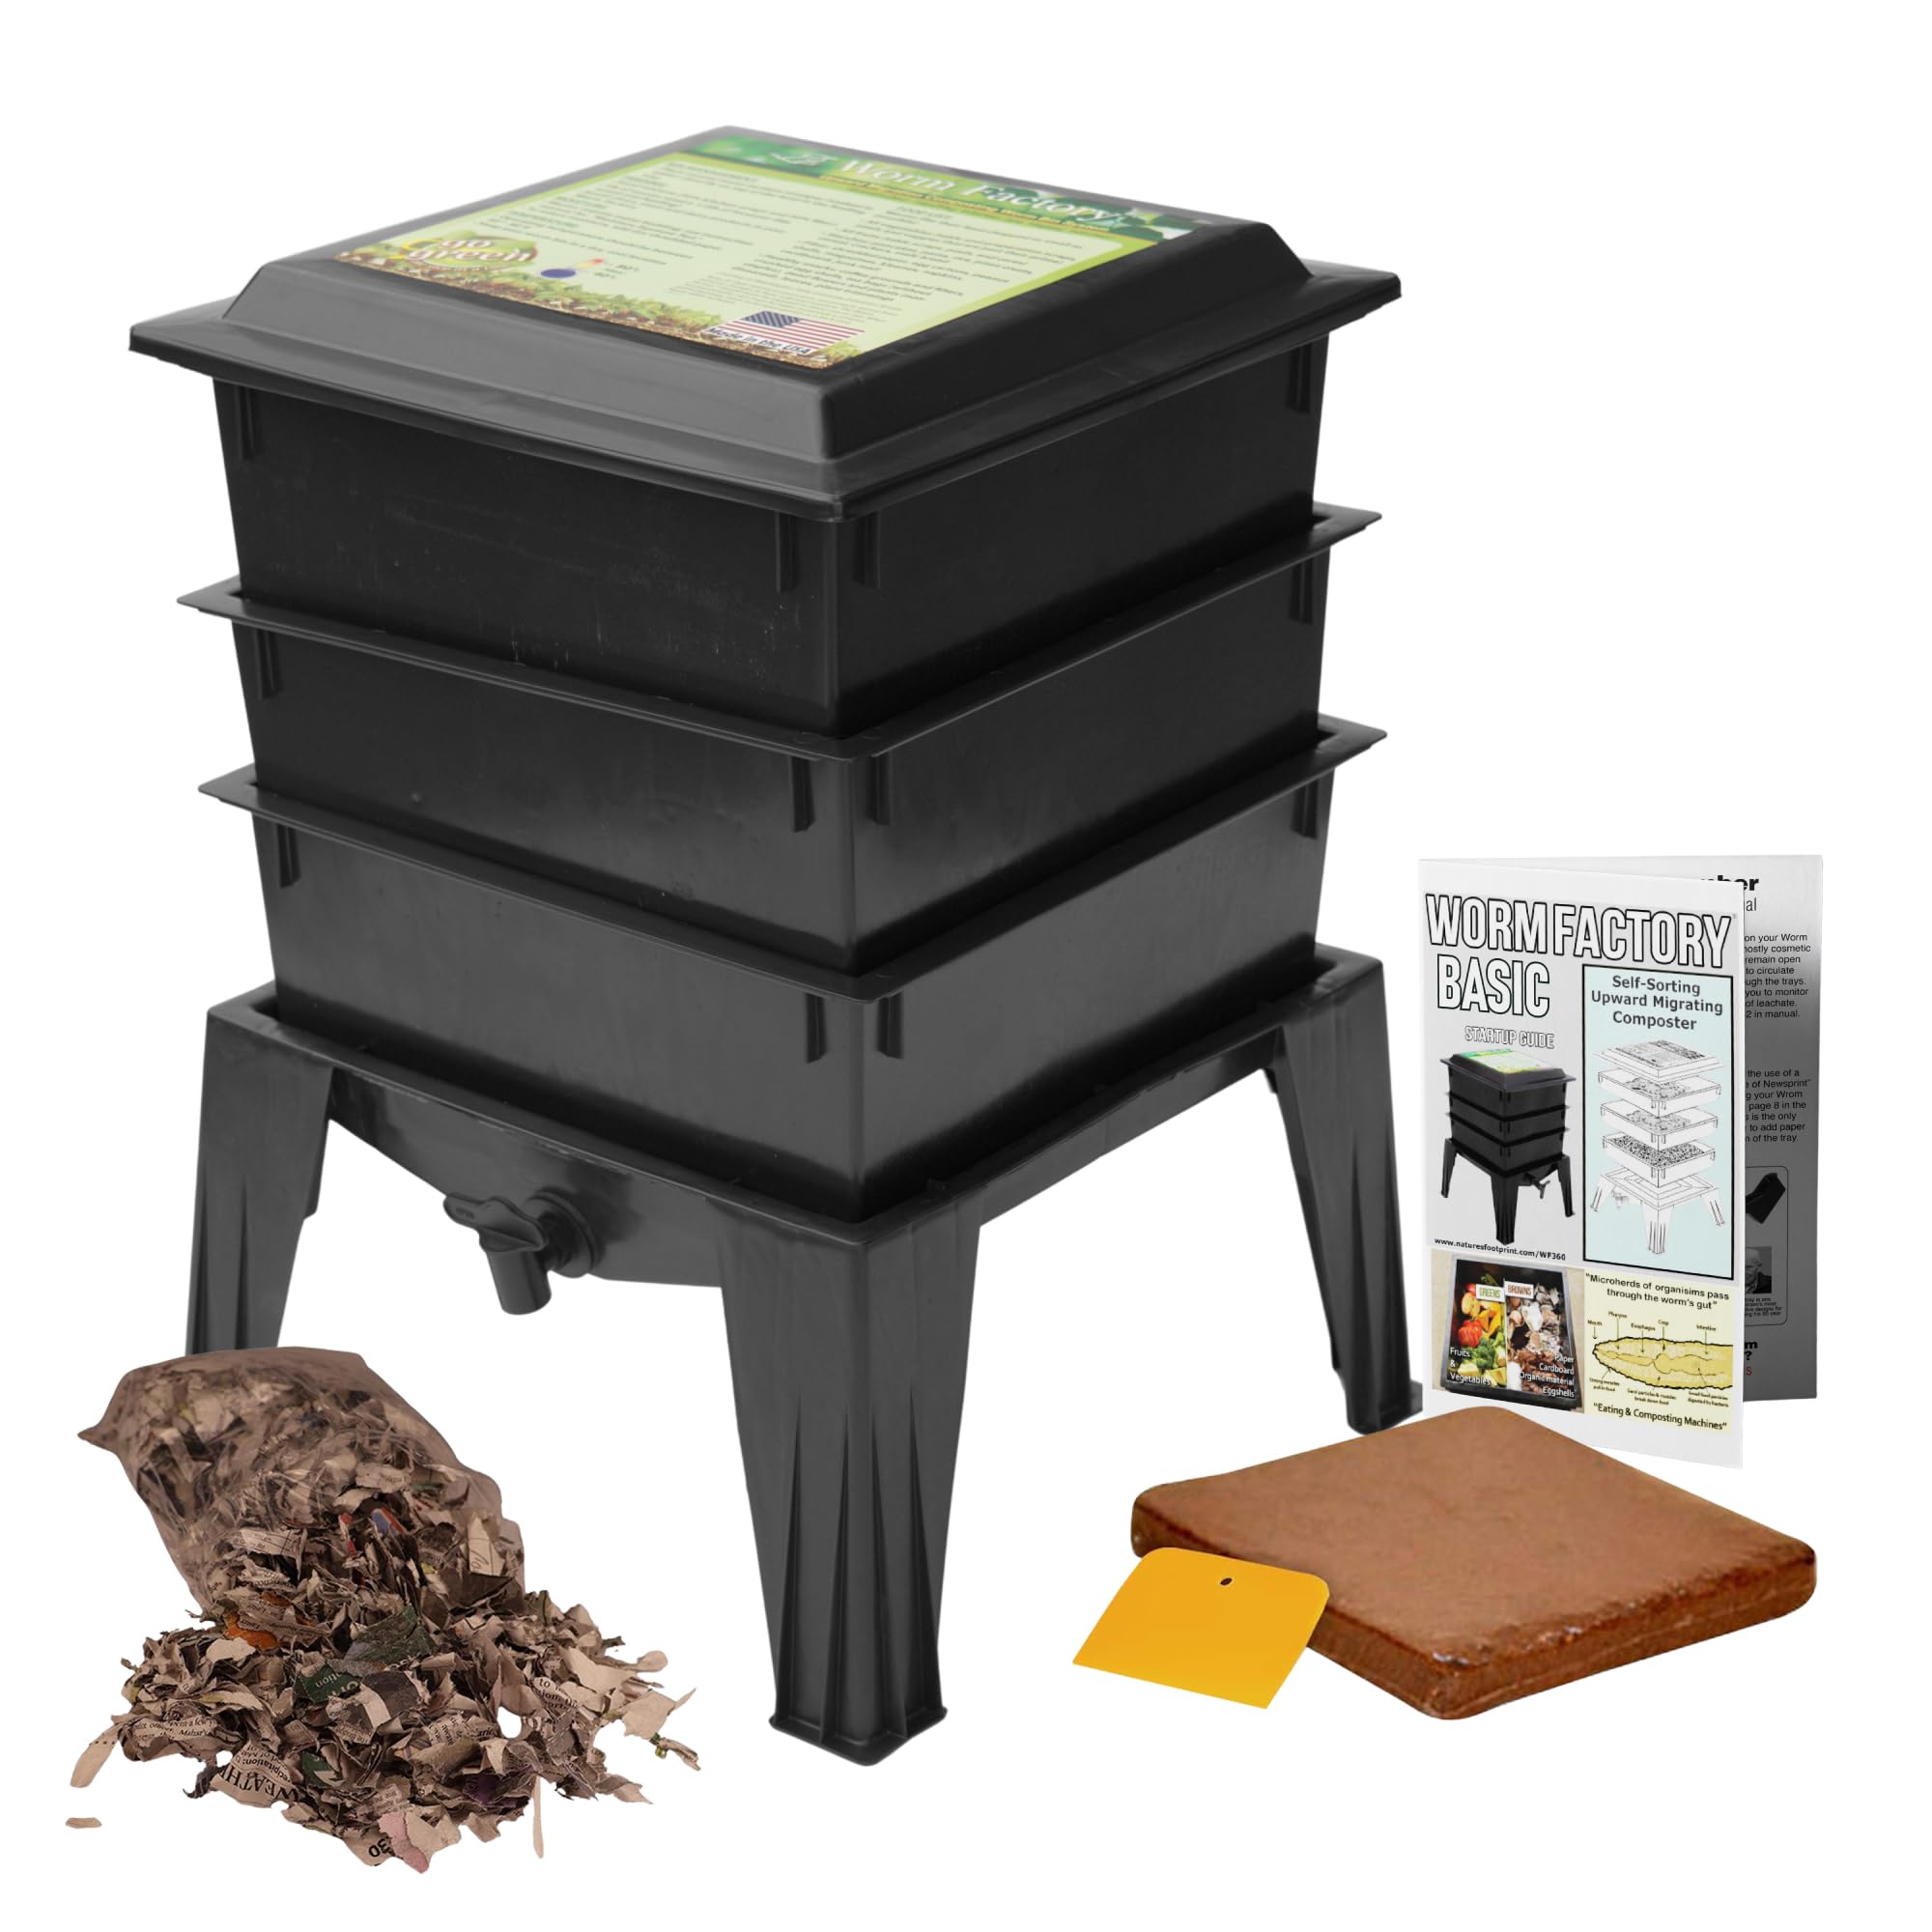
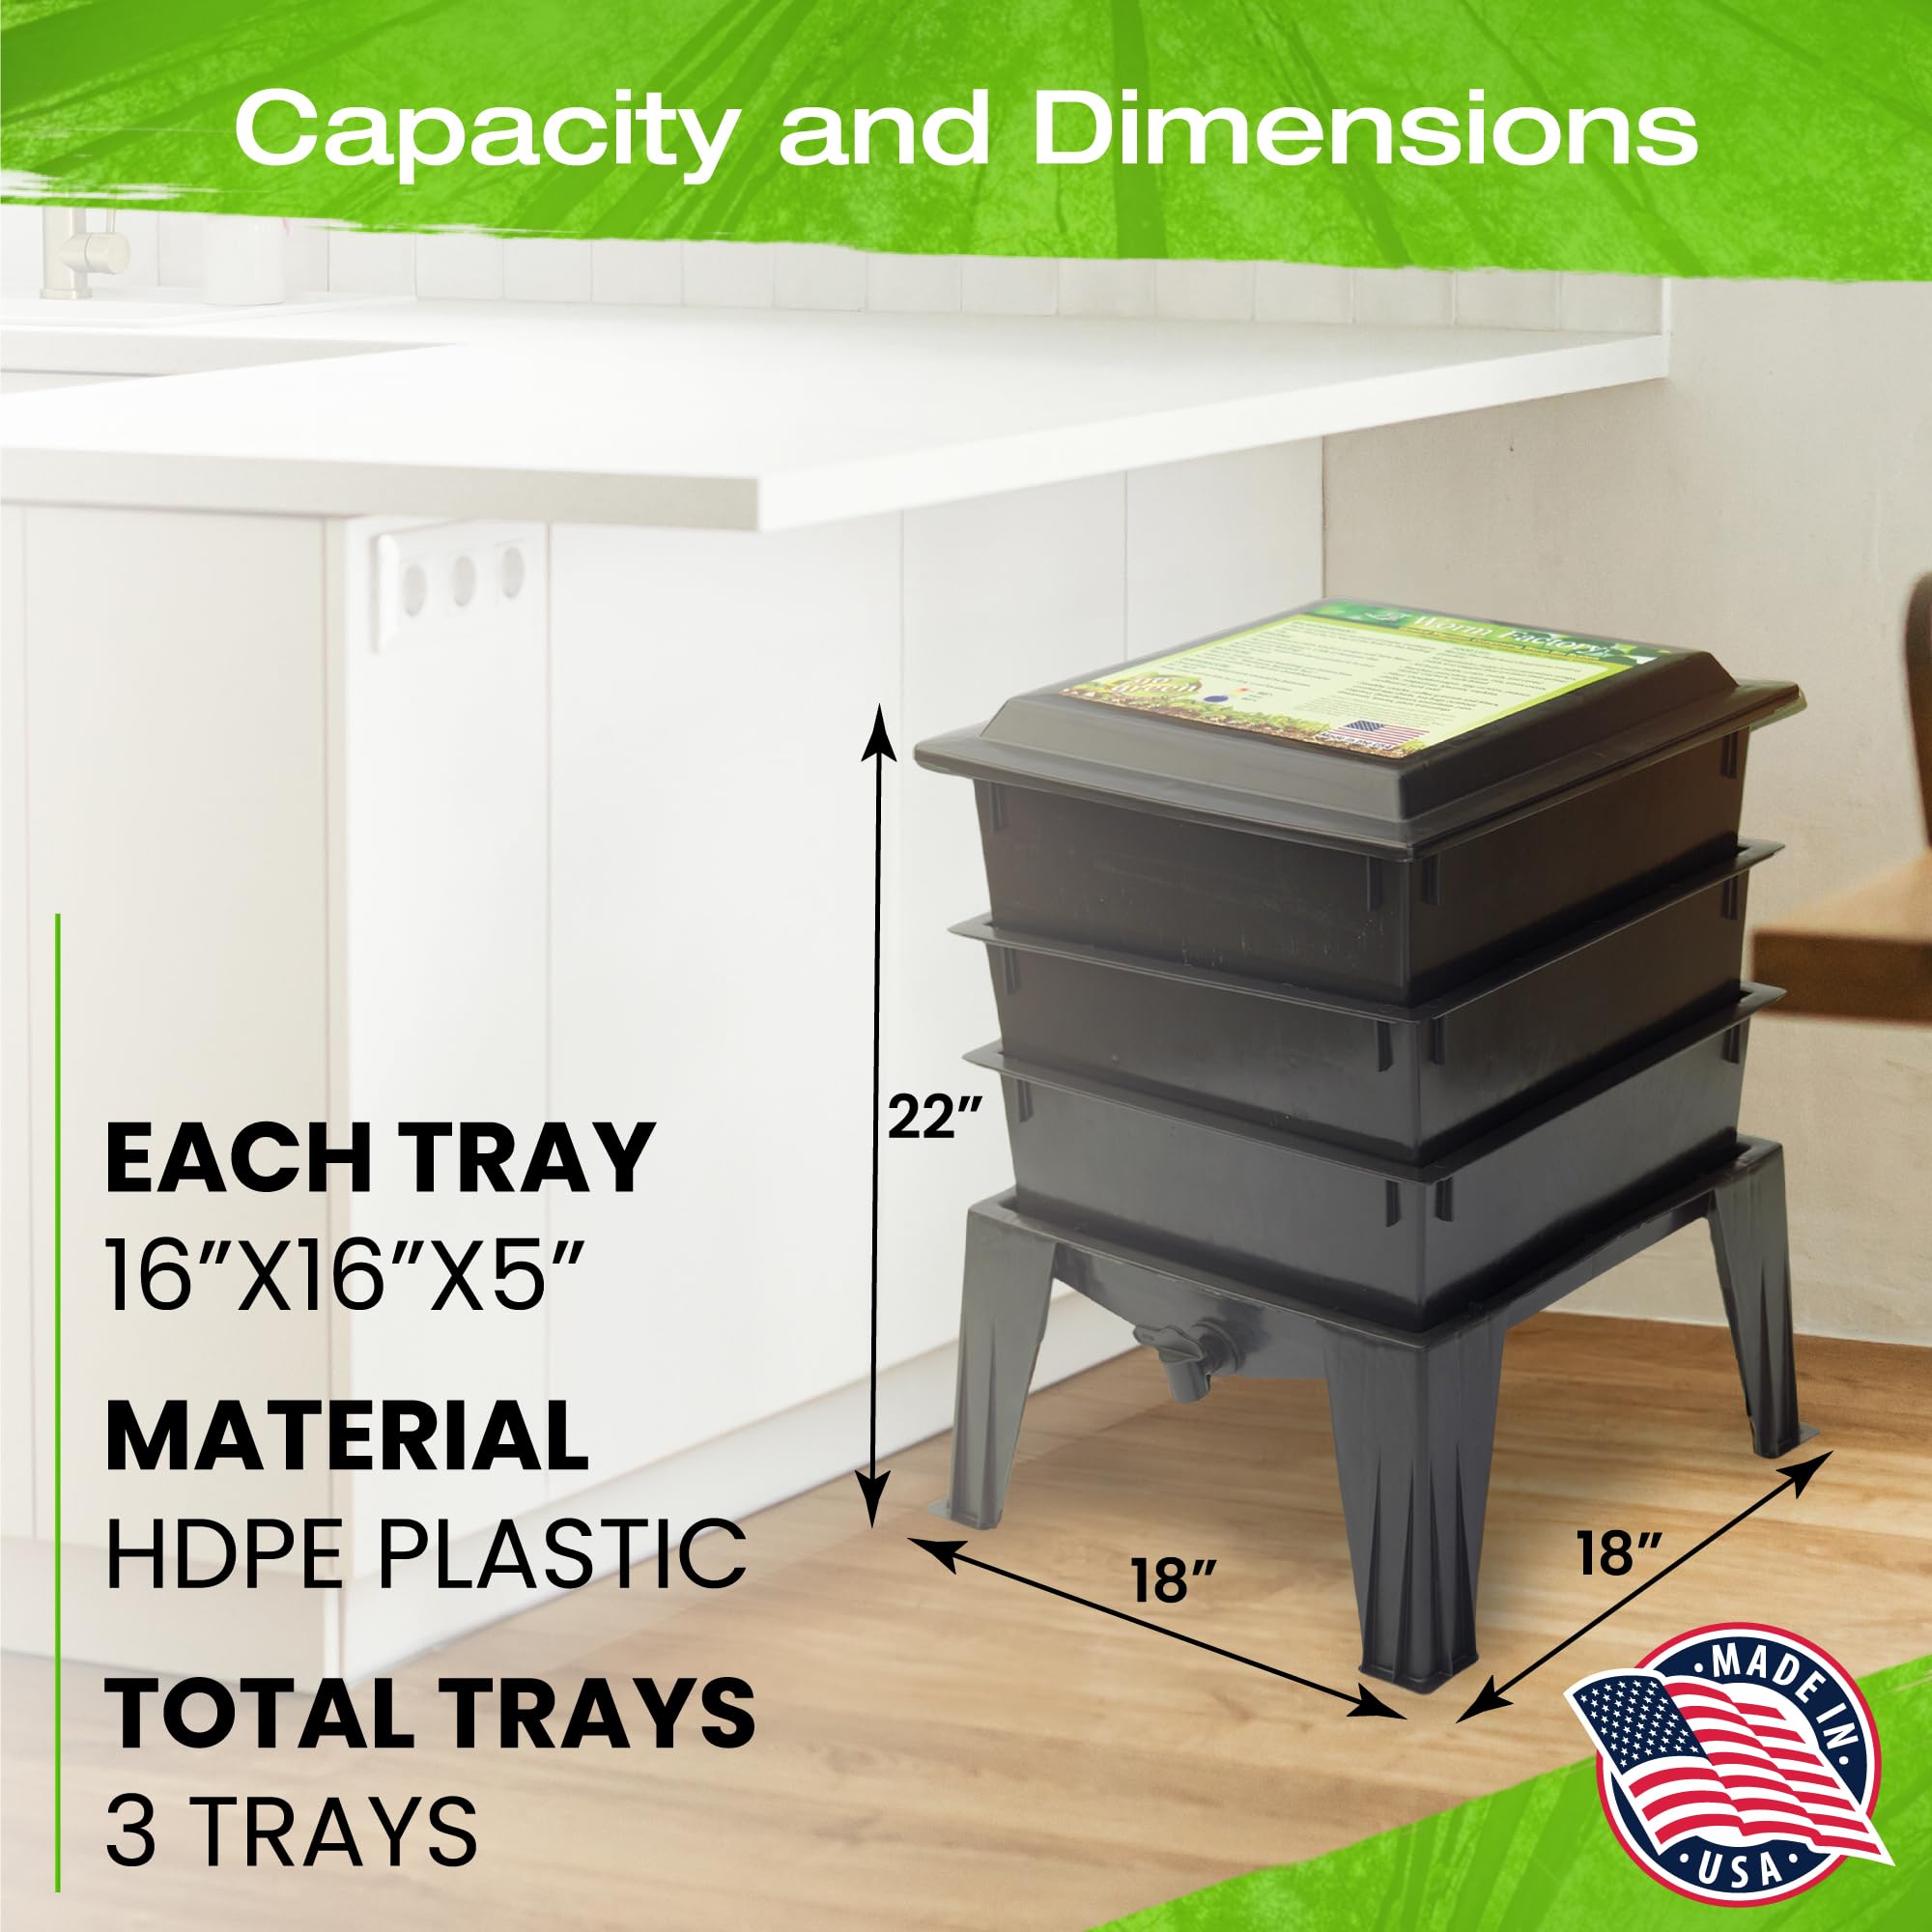
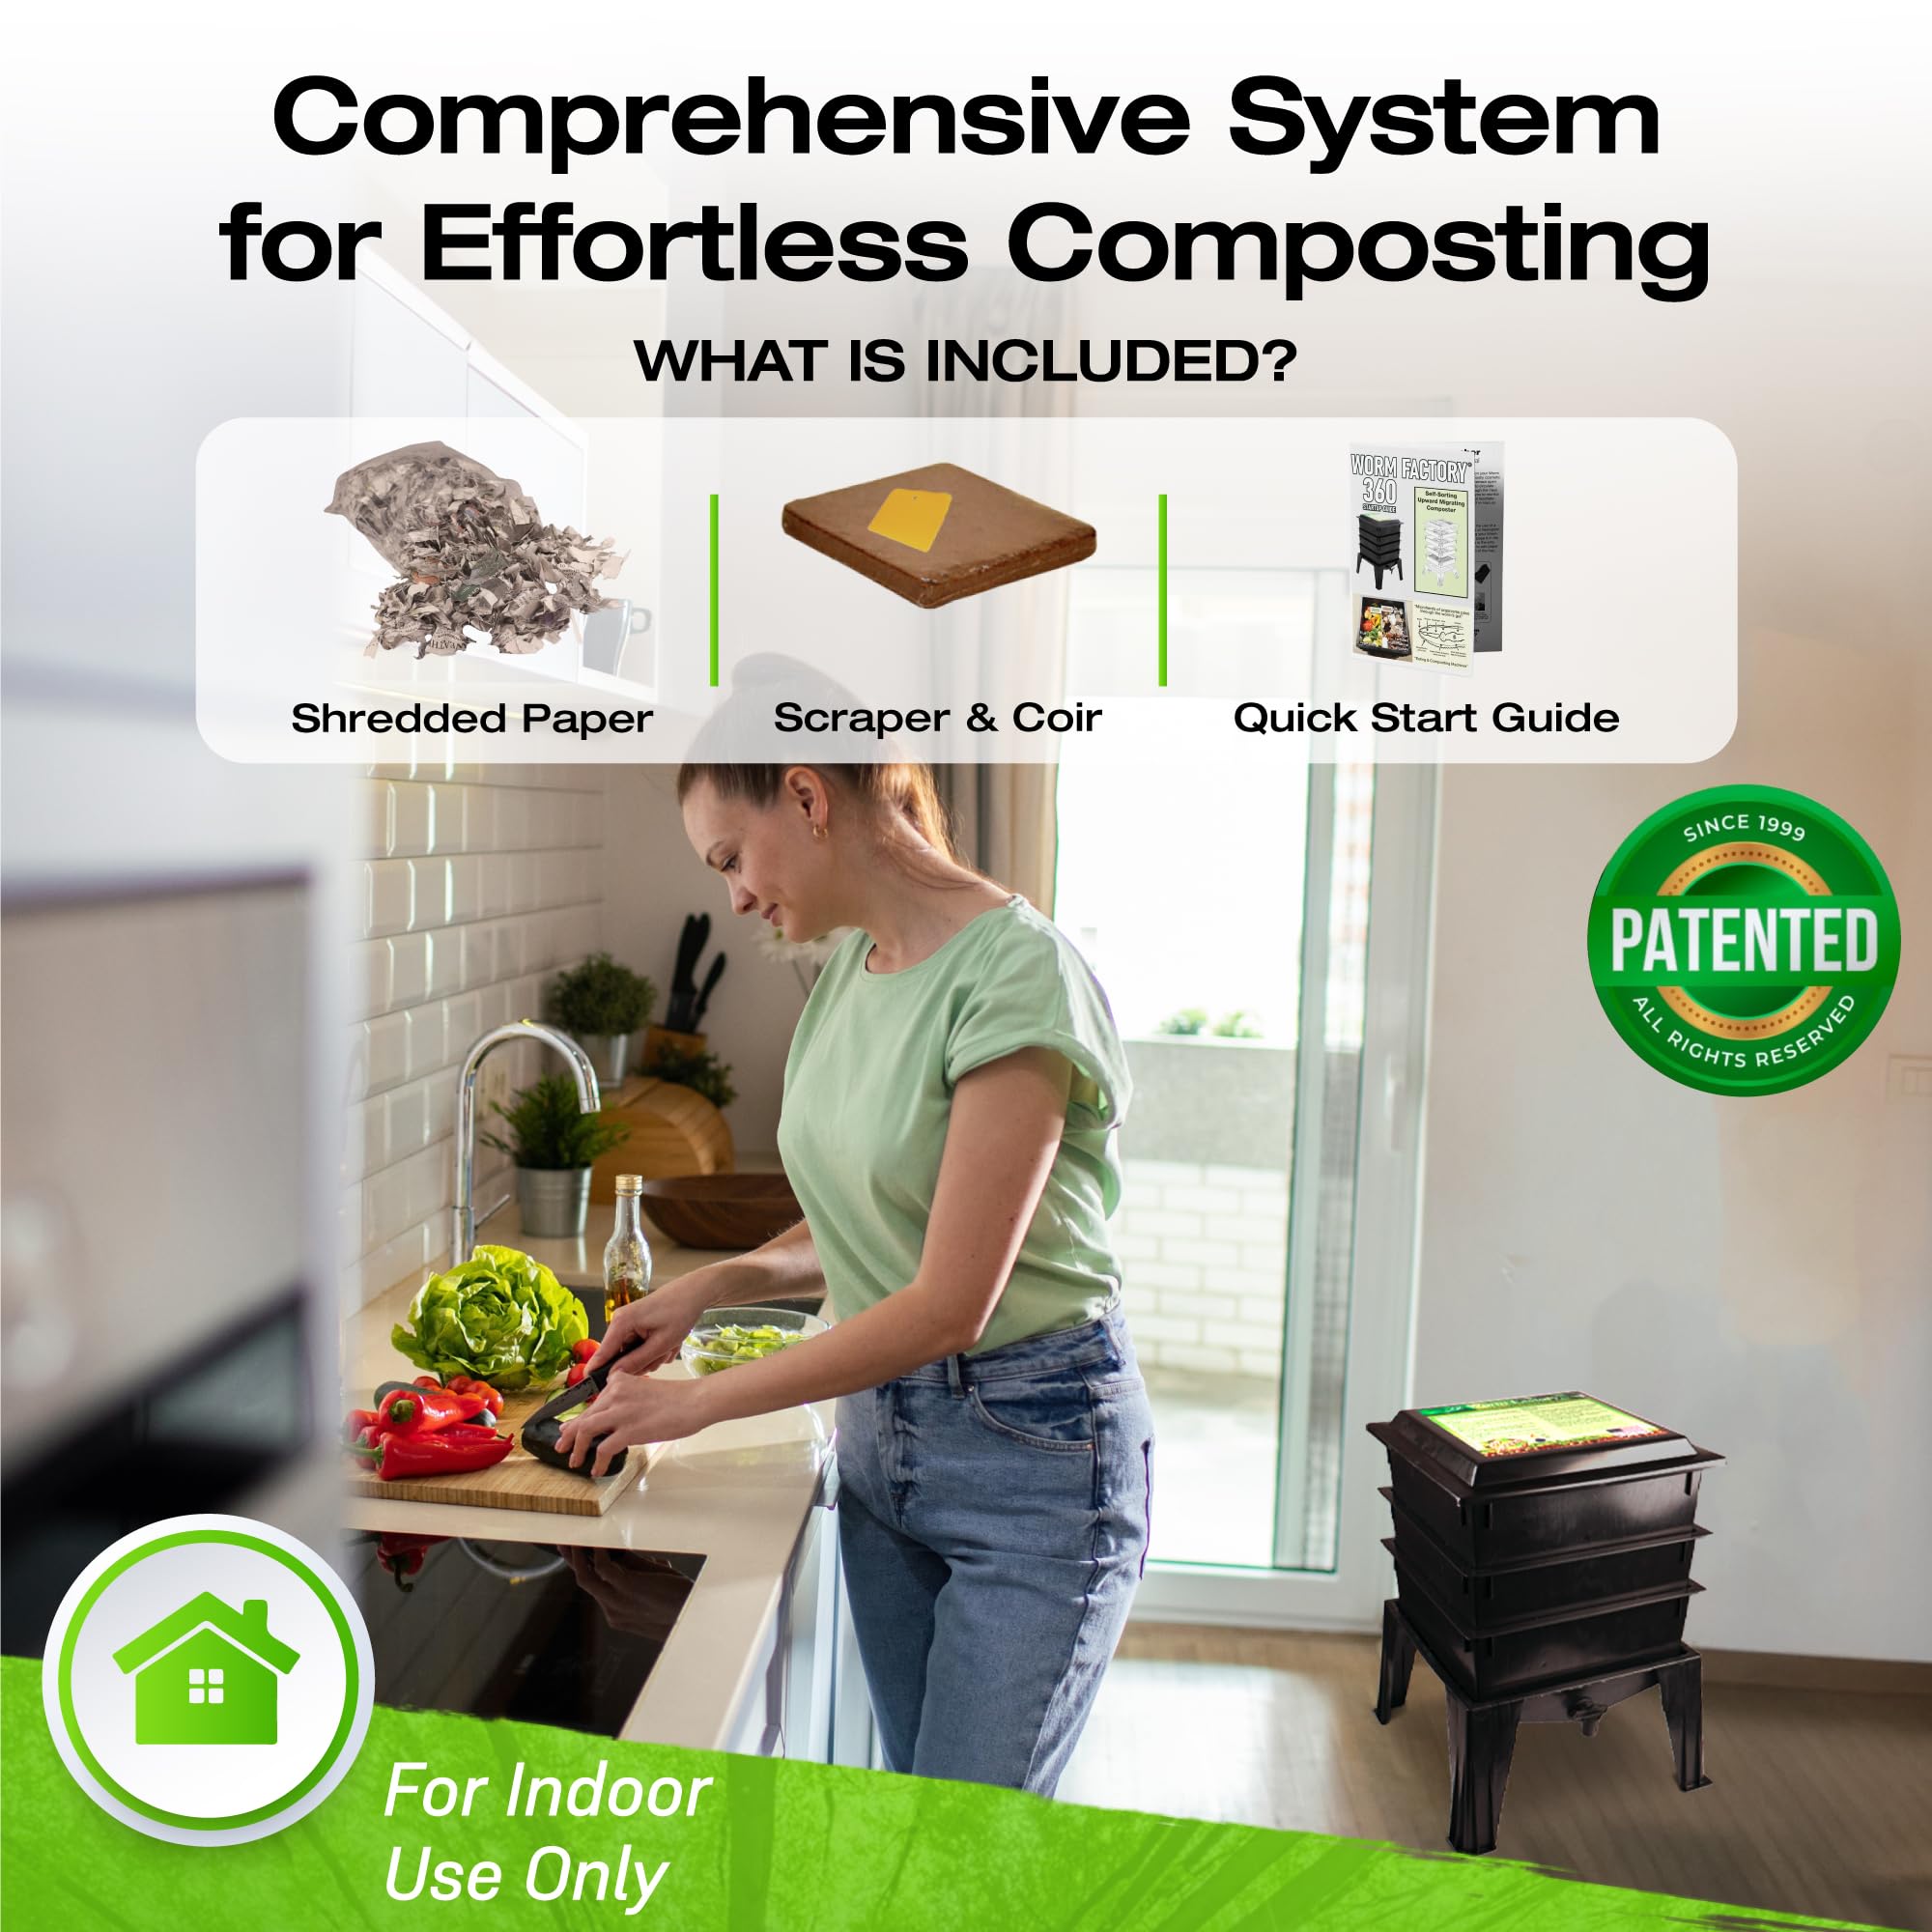
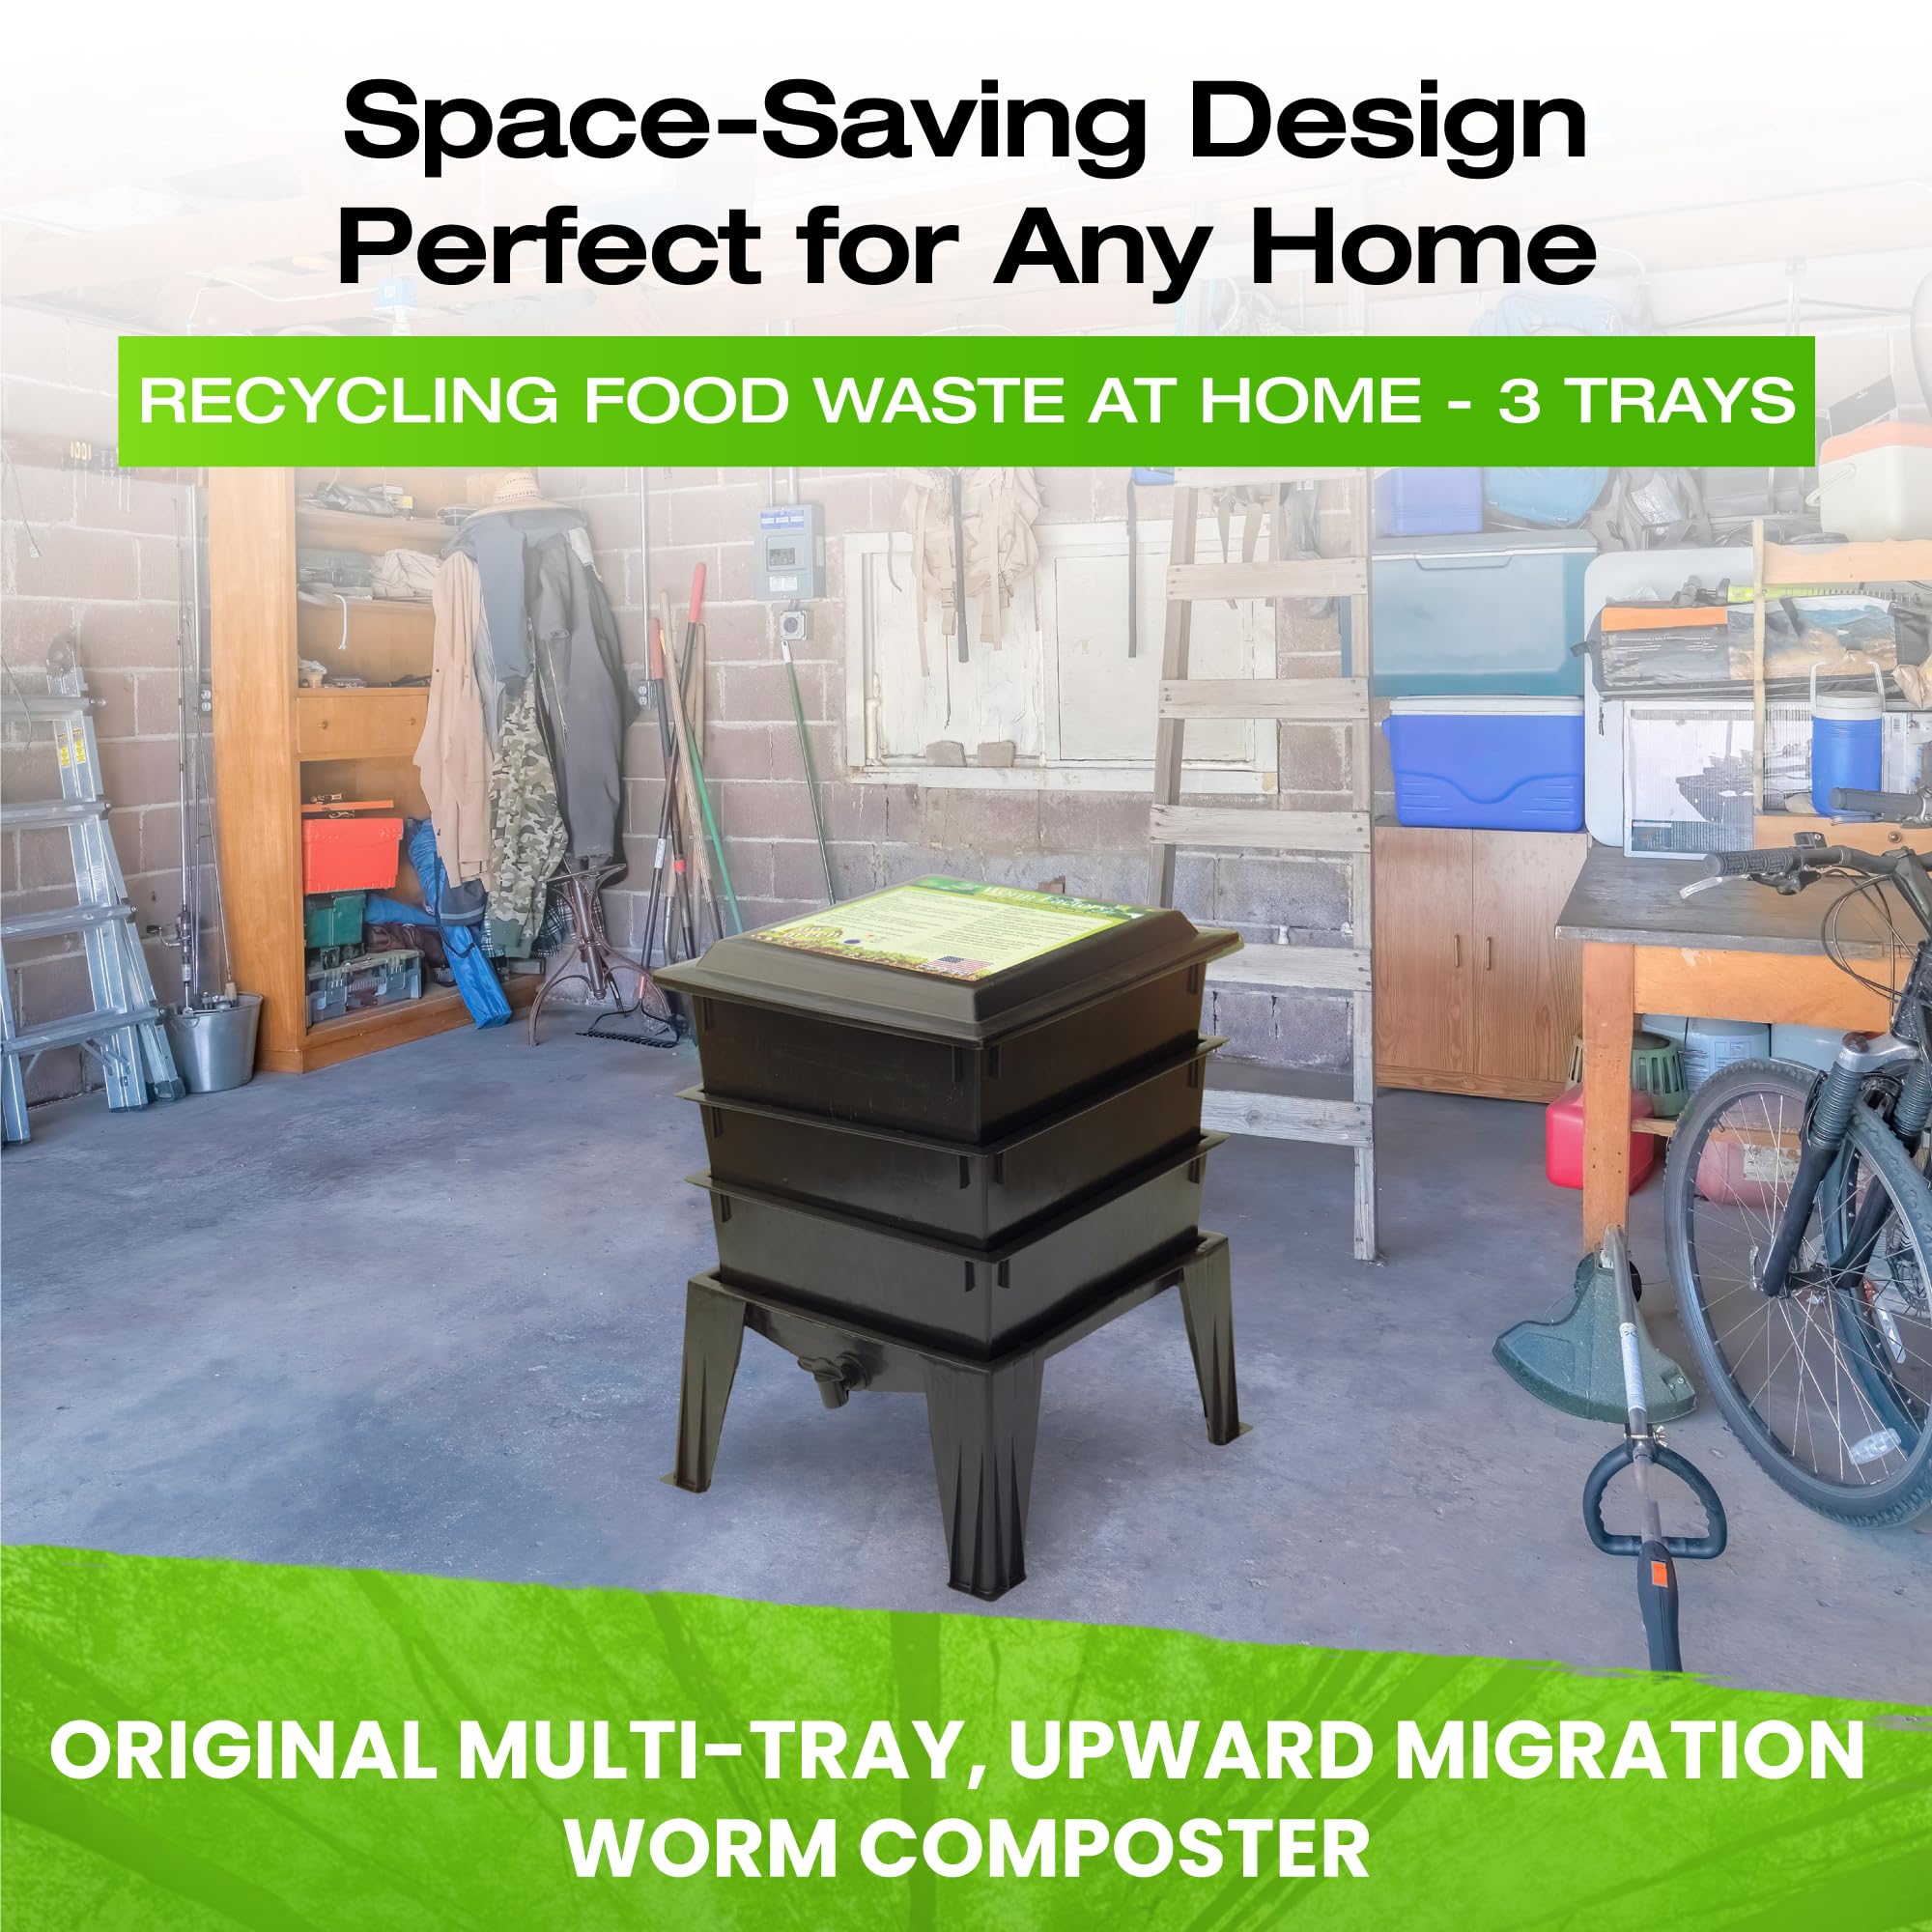
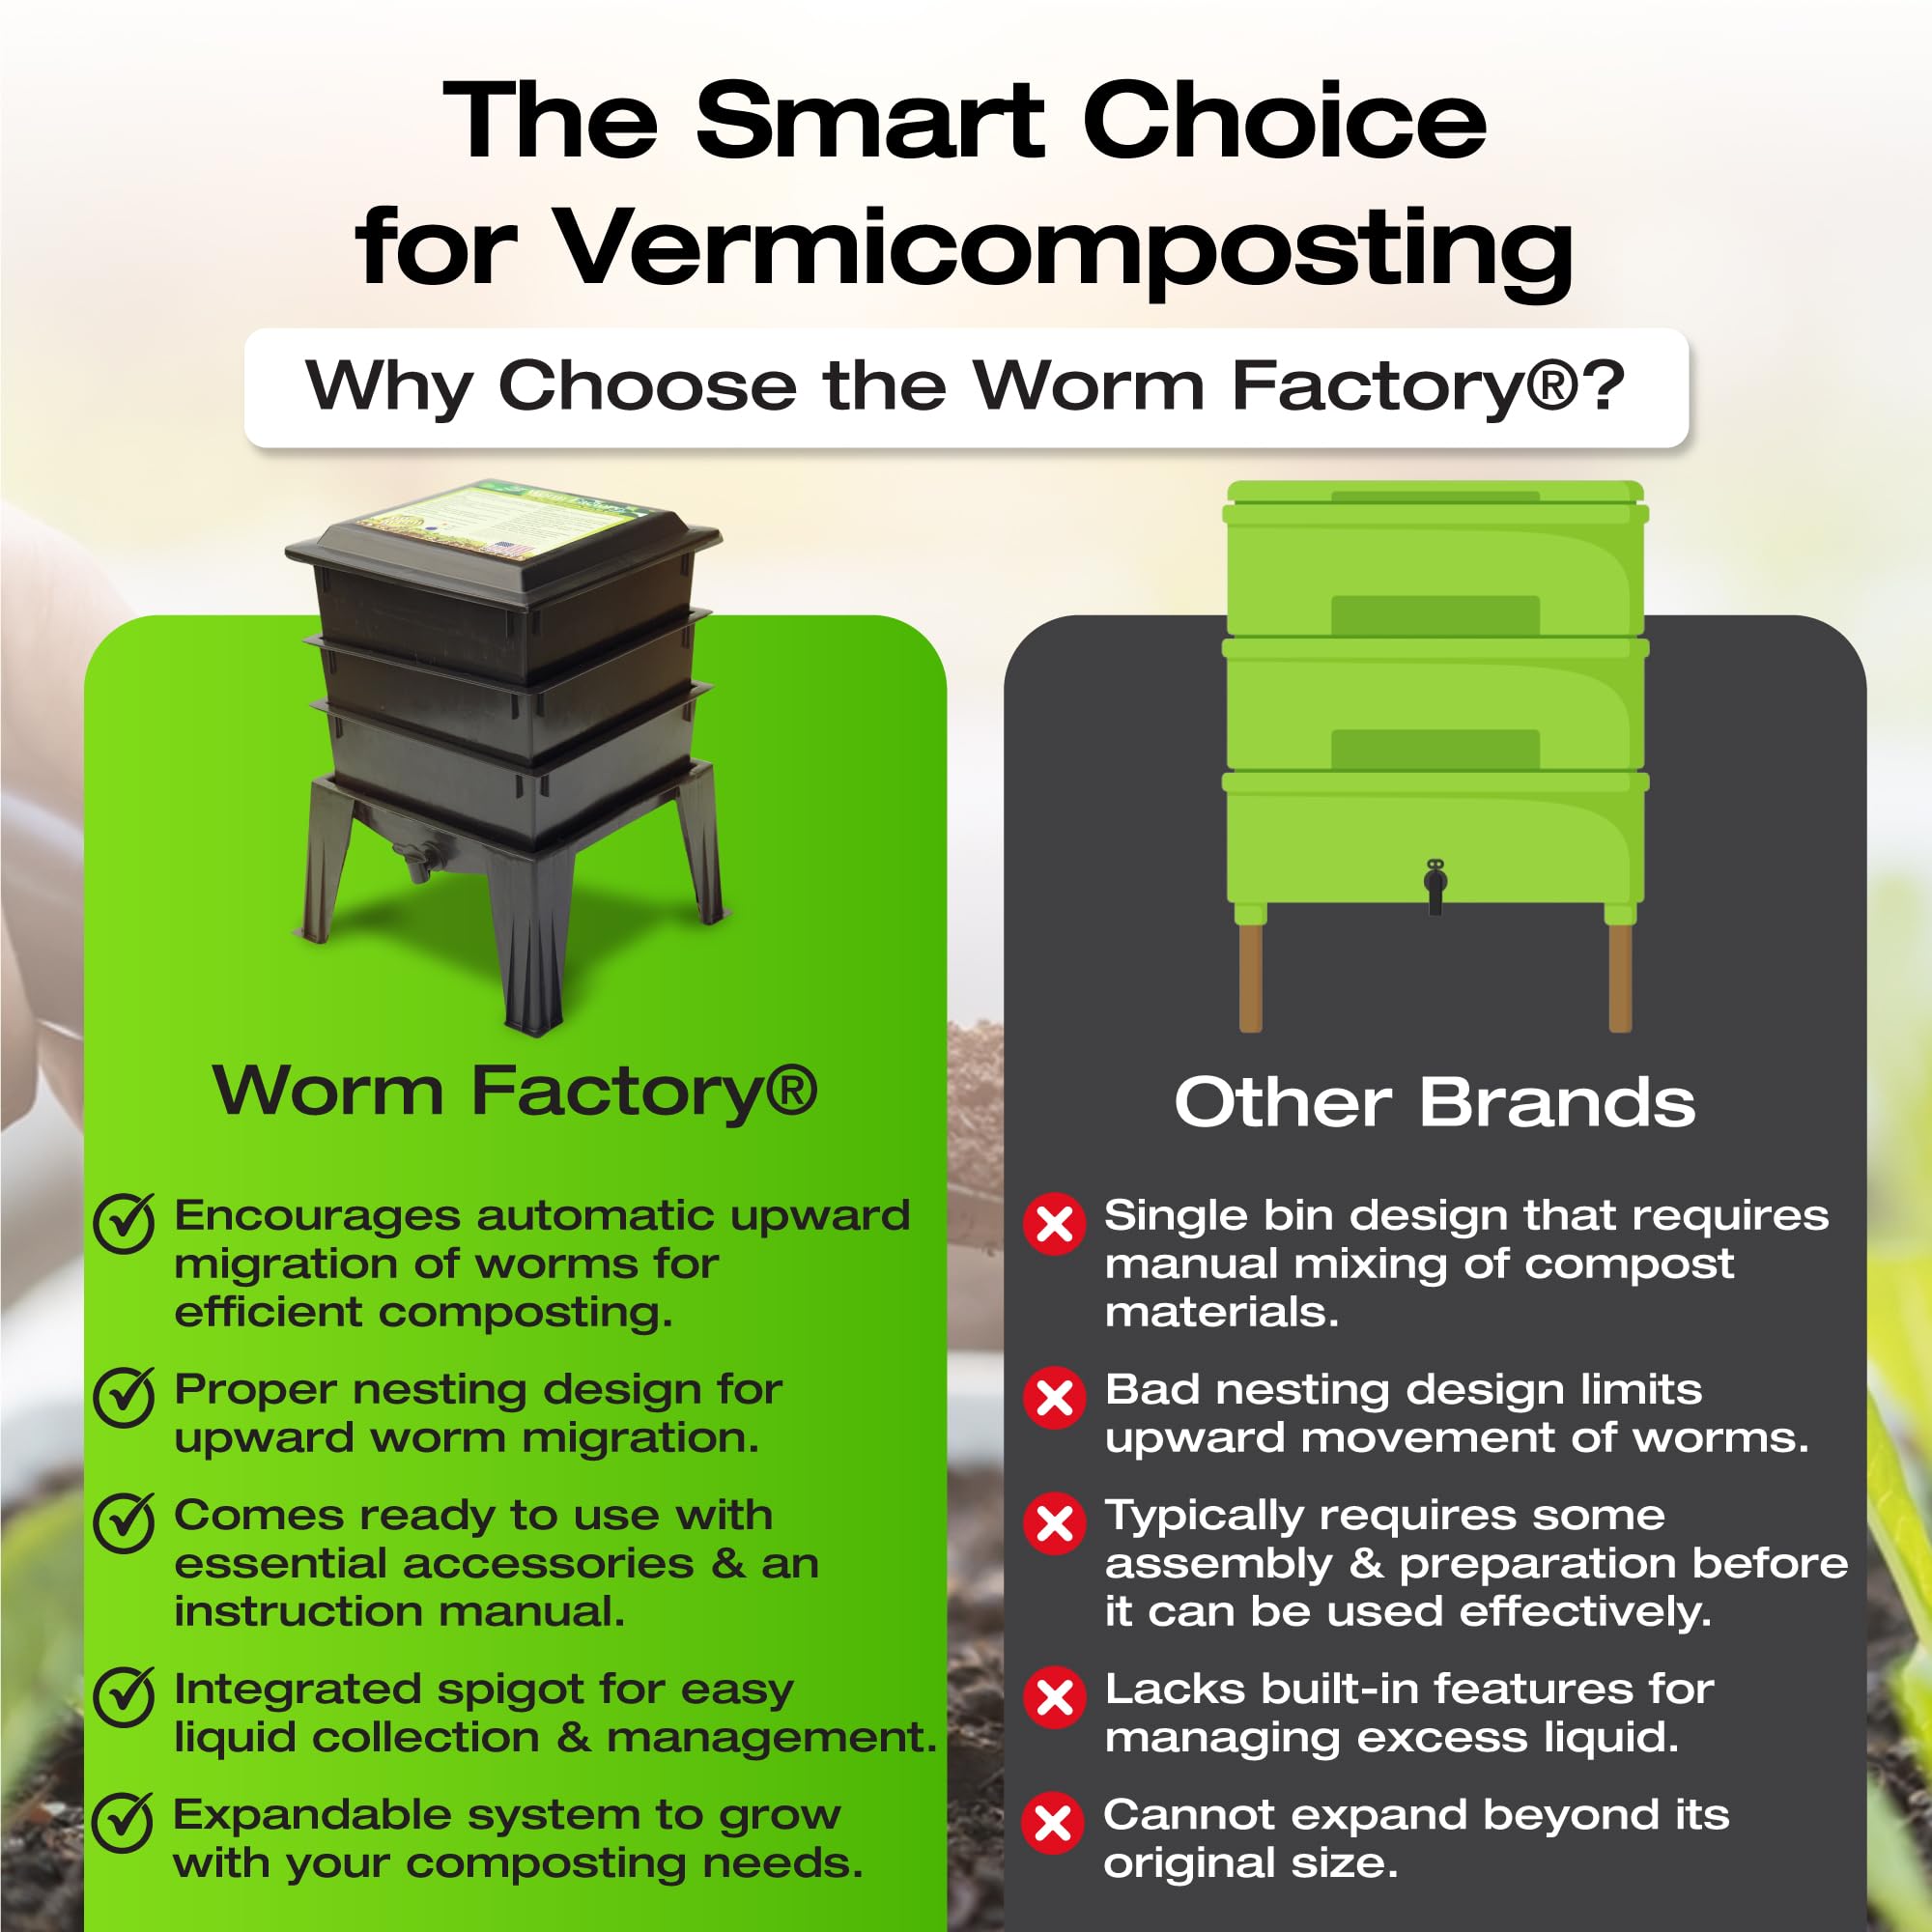
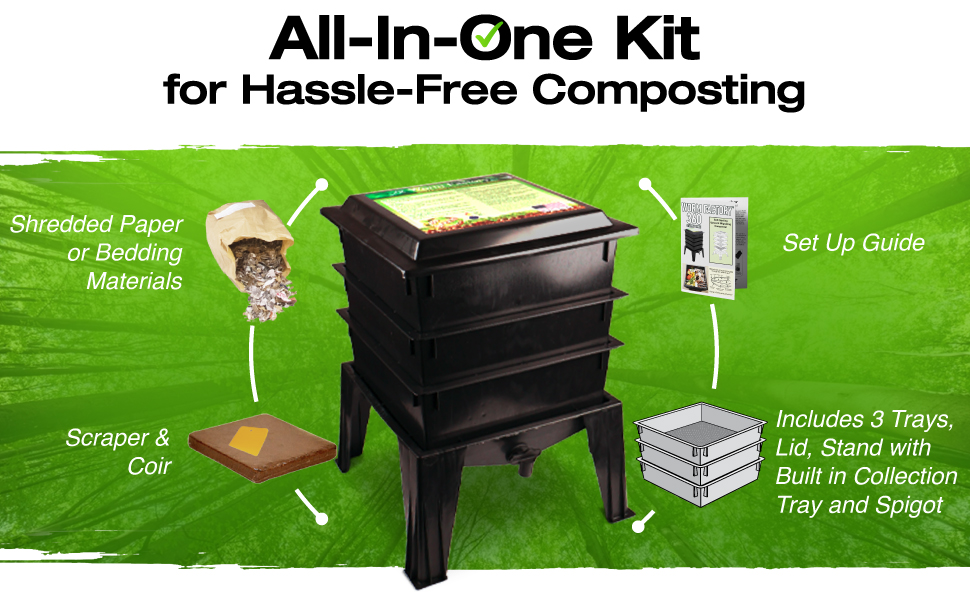
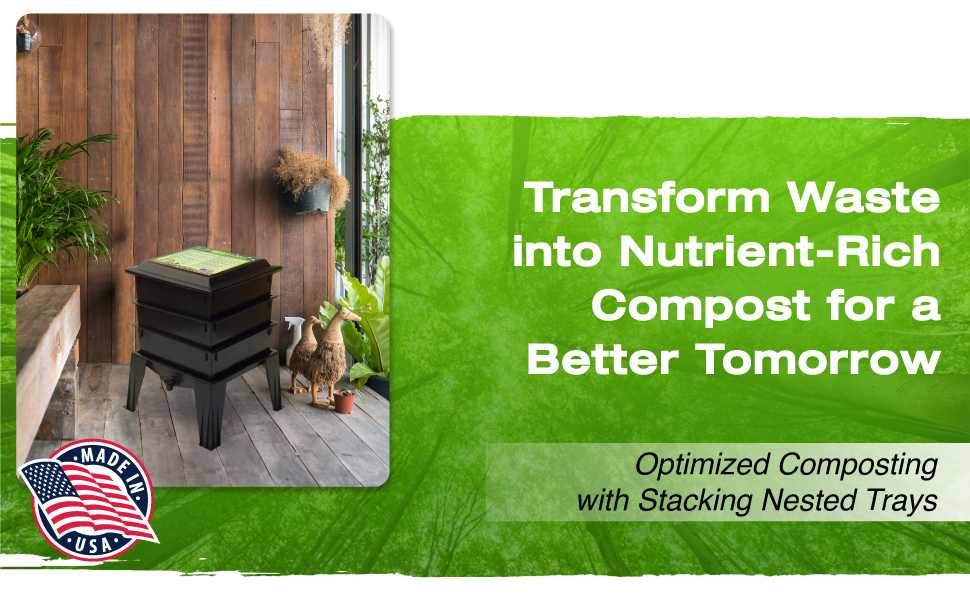
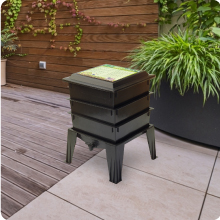
The Worm Factory Basic 3 Tray Black Worm Composter is a fully assembled, durable, and space-efficient composting system designed for home food waste recycling. Made in the USA, it features a customizable 3-tray design that encourages efficient composting while being user-friendly and odor-free.
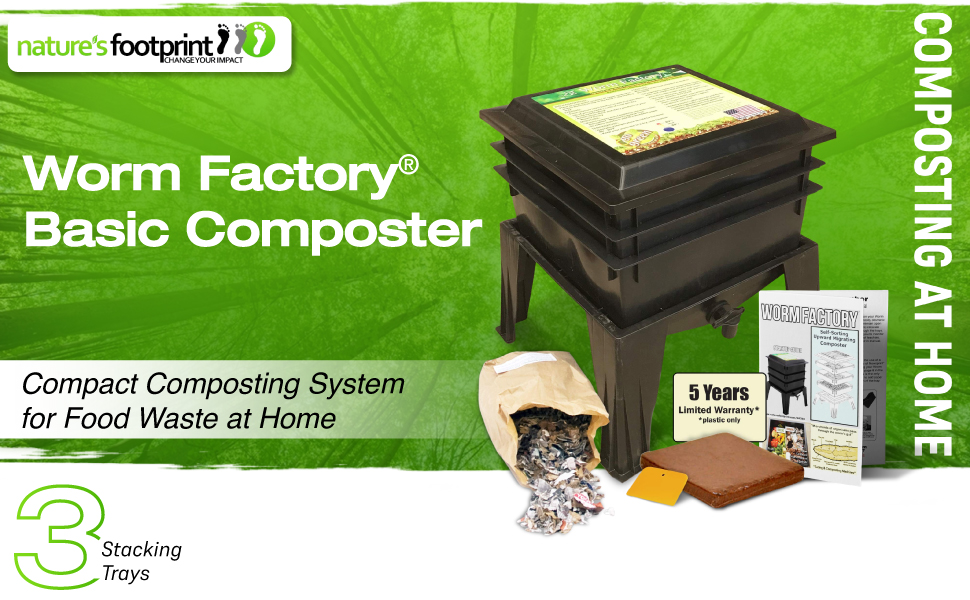


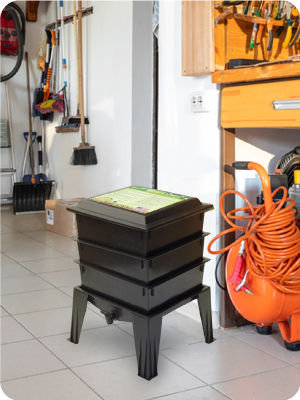


| Item Dimensions L x W x H | 18"L x 18"W x 22"H |
| Item Weight | 4.67 Kilograms |
| Shape | Square |
| Color | Black |
| Material | Plastic |
M**.
I have worms, but my husband loves me anyhow.
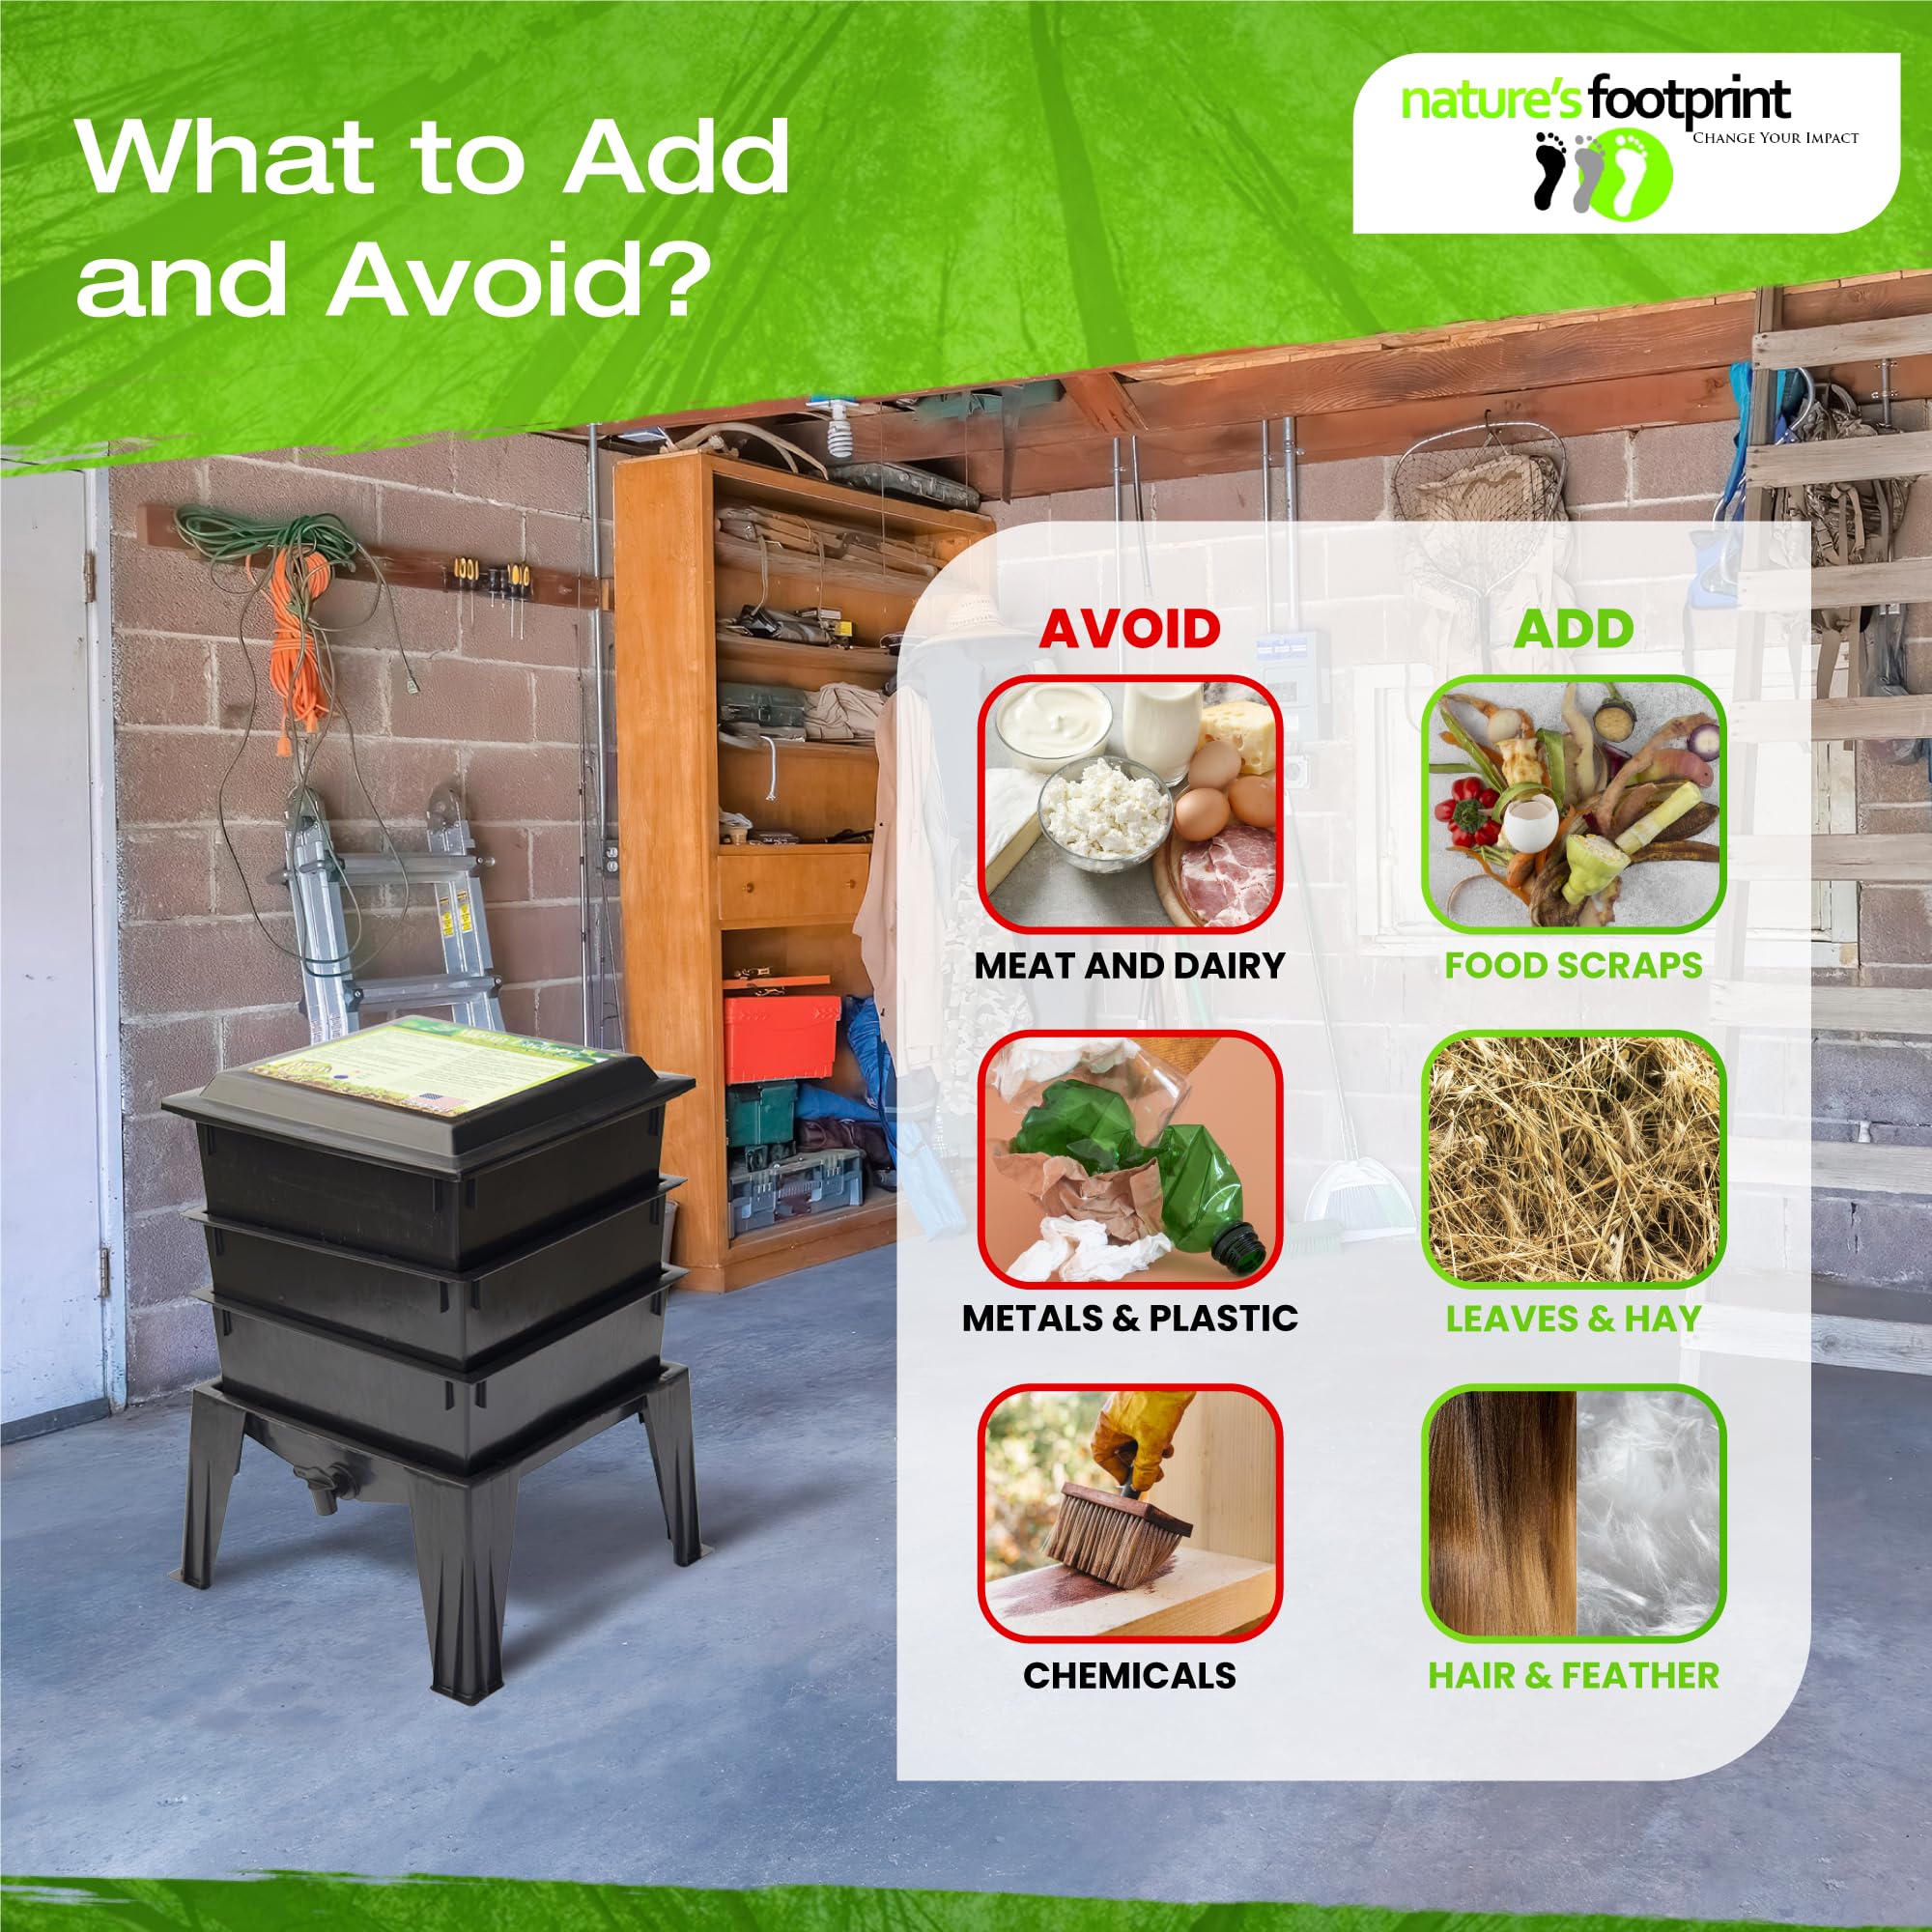
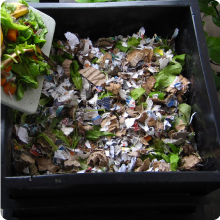
(As the process continues, the review will update.)Hi, I'm Michelle, and I have worms.A few weeks ago I made the decision to give vermicomposting a try. I live in an area that supports recycling, but we still have to take the items there. The rest of the trash costs us per weight, and ends up decomposing in a way that is not healthy. Why not reduce the trips to recycling, the money spent having someone else take away the rest of it, and end up with healthy compost for our plants? Hey, when it's January and you live in one of the coldest states, you start thinking about gardening so that you don't go all Jack Torrance.I read a lot on the topic, including a lot of advice on making my own bin. However, DIY bins almost always involved work in getting your slimy friends to go to The Other Side of The Bin. I decided to make the investment and buy a stackable unit, because they're made and used in a way that the worms migrate up and leave the finished compost behind. I thought it was well-worth the money now for the convenience and the anticipated money saved.Set up of this unit was very easy, and I choose to follow the advice of many to set it up a week or two before the worms arrived in order to introduce them in when the environment was ideal for them. Worms, come to find out, don't care about your rotting food and yesterday's paper so much as they care about the microbes that care about these things, and so setting it up allows those microbes to show-up and chow down. The kit gave everything I needed, including shredded paper, with the exception of table scraps and the recommended dirt to introduce grit and microorganisms. Dirt is not readily accessible in Minnesota in January, but I managed a couple tablespoons of mud. (Besides, when the worms showed up, they brought some dirt with them and I had some, er, well-aged scraps.)Yesterday -1/27/10- the worms arrived and I introduced them to the bin. While they were well-packaged, shipped next day air, and held at the post office, they'd still been through a lot, and were initially sluggish (is calling a worm sluggish a mixed metaphor or just possibly defamatory?) but after a couple hours much more active. They're mostly the surface and do seem to be attracted to the areas with the scraps.While it's early, and I intend to update this as the process continues, I'm quite happy with the bin and the very detailed instructions or setting up the bedding, etc. It's also very simple looking and attractive enough that, had I not a basement, it would be acceptable upstairs. A nice feature, and you can see it in the picture, is that the lid has quick guide to what scraps are best and offers some great tips.I'm new at this, but I'll happily answer any questions I can in the comments about my personal experience or understanding of things. If you email me, I also might post that to comments -- referring to you as Ann on a Mouse, if you're shy. YouTube has lots of videos, but you will feel weird confessing to people that you've spent hours watching people fiddling with worms. (Trust me, I've been there.)***2/3/10Going well. Learning to not over -- overfeed, overworry, over-nose-around. The worms are still adjusting, but the environment seems to be working, and they're going at the scraps. Because I cook most nights, and make lots of veggies, I think it'll be a while before they'll be able to handle what I could give them, so I'm holding back.! There has been a day or two where I've not added to it, and let them catch up. Been grinding the scraps up in a chopper -- anything to start them out right. Also, upping the amount of fiber -- newspaper, mostly. Only 1 has tried to go "over the wall."I continue to read up on the topic and my friends are either genuinely interested or humoring me until someone can show up with my injection.***2/07/10Hubert Hawkins: The pellet with the poison's in the flagon with the dragon; the vessel with the pestle has the brew that is true.Griselda: Just remember that.The Court JesterA mortar and pestle is a great way to ground up dried egg shells. The worms use them for grit, which aids in digestion, it's a source of calcium which could help with reproduction -- or not -- and it prevents the soil from being too acidic. This is the one I have: Harold's Kitchen 3-1/2 Inch Round Mortar and Pestle, but I picked it more for looks than practicality. If you've saved up a number of shells, I've read you can use something like a plastic bucket, or dishpan, and a mason jar. A lot of folks just crumble by hand or toss the shells in whole.***2/14/10Happy Valentine's Day, and what's more romantic than a bin of worms?Things are going fine. I've found a warmer spot in my basement, and now the bin is at about 65F, which is the best I can hope for this time of year unless I want to move the gang to the guest room. I've also ordered more worms. We're just creating too much waste right now and could use the help ... and I'm impatient. We have a freezer in the basement and I have a good size Tupperware container to freeze excess, but there's only so much room.As kitchen scraps accumulate I use Norpro Ceramic Compost Keeper (in red.) It works well, and has a filter to stop your kitchen from smelling. The handle is shoddy though, and it arrived chipped -- I'll be honest and say I should have gotten a metal one. Whether you chose ceramic or metal, there are attractive designs out there though, that'll look okay on your counter. Compost keepers also allow scraps to age for a few days, which means they attract attention faster in the bin. Freezing scraps, or microwaving them, also breaks them down and has a similar effect, with the added consideration of killing off fruit fly eggs or mites that might have hitchhiked from the grocery store. Most mites are actually beneficial, but I think most folks are more comfortable not having stow-aways. One last note on the counter compost keeper: mix it up a little and be aware of how old the oldest scraps are so that you don't end up with a stinky mess at the bottom. After a week or so, maybe less, it's time to freeze or make sure the oldest stuff is what's for dinner in the bin!***2/15/10I should mention that the Worm Factory comes with a lot of stuff. There's coconut coir for the base bedding, and a lot of people swear by it and continue to use it. It's sent as a brick and you soak it in water until it's hydrated and smells like earth and clean soil. There's shredded newspaper, also for bedding, and other related materials. (Paper and cardboard serve as food & bedding, and the addition of them throughout the process keeps smells down, helps if you end up with extra moisture, and it vital to the process.)There's also a hand rake and a scraper. I've never used the scraper. There's also a thermometer which my husband wrote WORMS across so that there are no mix-up with the one in the kitchen -- I supported him in this. There's also a detailed instruction manual, which helped put me at ease. (This is what I received and what they offer currently -- I'd look at the product description to verify this is still accurate when you order.)The WF (Worm Factory) is designed with a spigot to drain out extra liquids that might fall into the collection tray -- which is different from your working tray with the bedding, worms, and scraps. How moist a bin should be is the matter of some debate and nothing I feel experienced enough to speak to. There are also many discussions on what to do with this liquid -- which is called leachate, but some people call it worm tea. Most experts call worm tea something else -- a deliberate effort to create a mixture to pour on plants which I'm too early in the process to have done. I will say that my bin is moist, but not so moist that there has been drainage. I've rescued the odd worm from the collection bin, but not more than a drop or two of liquid. Since bins evolve, this might change. The design is also made for worms who fall down there to be able to crawl back up.I'm adding updates enough to see this will get unwieldy before too long, so I'll announce them here, but place them in comments. :)***Latest update, 10/26/10, see first page of comments.
A**A
Perfect starter bin for novice vermicomposter!
Product arrived quickly and everything neatly enclosed.At first I was slightly disappointed because all of the starter “ingredients” were in plastic baggies with a twist tie (the advertising photos depicted nice looking packaging for these items). But I used nearly all of these bagged items immediately to set up the bin, so who cares if it’s in a baggie vs shrink wrap...I will note that the mineral dust was the most difficult to work with in that baggie. It’s advertised in a little shaker/ spice jar, which would be ideal- I ended up pouring it into a spare jar. The baggie was very thin and had a tiny puncture, so it left a thin coating everywhere I moved around the room.But I used all of the shredded paper material, half of the coconut coir, and half of the pumice. So I just threw the half coir brick and the baggie of pumice into a heftier gallon zip bag.When mixing the initial ingredients, the coir is a little tricky to moisten: you need much more water than suggested.Stand the brick on a skinny side and pour water around it- it’ll quickly soak it up and start crumbling. Use approx 0.5 cup at a time, letting the brick soak and crumble each time. Only do this until you can break off the dry top half of the brick.(I actually went too heavy on the water here due to impatience, and had to use the whole bag of shredded paper, plus more from around the house, to soak up the excess moisture... also a great way to soak up moisture in an established bin!)Note to self: Don’t use your nice new kitchen bowls to mix the “ingredients”. The little bits of pumice are rough on good dishware...The day I ordered the Worm Factory, I set out a torn up drink tray soaked in water with some pear and apple cores in it. I left it on my counter until the Factory arrived.Once I’d mixed all the fresh new components, I also dumped the moist paper/ fruit mix into a corner of the new bedding.Covered it with wet newspaper per instructions and set it in the sunroom (luckily a shaded North-facing sunroom so we rarely get over 80F in there during the summer).PS grab a spare newspaper when you order this!You need a few sheets to place at the bottom of your first tray (you never do that again, it just helps your new work colony figure out up from down lol).You also need a nice thick layer of wet paper towels on top of the pile.And the rest you can shred up as part of your fiber/ “browns” for the next few weeks.They’ve changed a few advertised items too, but none of them are crucial to starting up.The moisture meter is junk, don’t spend extra money on it (I got one included in my package).I haven’t needed the flat edge scraper, I suppose it’ll come in handy when harvesting my first load of vermicompost?And the little mini-rake is actually replaced with a long handled wooden spoon. I’ll be honest... I used the spoon to mix the clean bedding and realized I liked it too much to stir compost. So I washed it up and it’s in my utensil drawer to use for cooking pasta. But I have needed to give the pile a good stir a few times, so I’ve used a regular old fork to gently stir things around.Hubby ended up getting me a little plastic children’s beach rake from the dollar store’s summer section, so I’d stop using our forks to stir moldy fruit haha.I initially did not receive the advertised thermometer with the order, but Squirm Firm was awesome about mailing one out the same week. The thermometer is actually the best tool included so far, it’s not digital but it’s super responsive and has the temperature ranges painted on it for quick reference!(Sadly the Worm Factory manufacturer discontinued the “sprinkler tray” advertised and shown in many of the photos. It’s just the little black box that fits under the open spigot...I’m using a tall round plastic Chinese carryout container under the Factory. It’s not glamorous, the pictured Sprinkler Tray just fits the look better, but it works fine.I haven’t had a single drop of leachate drip from the spigot in a week, but I know as soon as I move the trashy plastic container I’ll have a flood lol.So if you’re keeping your bin in a closet or basement, the lack of the nice catch tray is no loss. But since this is my big project, I’m proudly displaying it in the sunroom and eagerly show it off to everyone.)This bin does not come with worms, but that actually worked out better for me.I ordered my worms online the day the bin arrived, so the new bedding had some time to properly fester (I know it doesn’t sound appetizing but those little wigglers love things extra nasty).I hadn’t realized at the time that Nature’s Footprint, the Worm Factory manufacturer, sells red wigglers.So the best price I’d found online was from Uncle Jim’s: they always have promo codes, their worms are small but very active, and they ship promptly if you order early in the week (they won’t ship Thursday/ Friday so your worms don’t cook over the weekend in a postal warehouse). HOWEVER Uncle Jim’s only sells a “red mix”, which isn’t only Red Wigglers- they mix in Indian Blues and European Nightcrawlers. I’m not the biggest fan of the two latter worms, since Indian Blues can overrun a bin and Euros burrow deeper than I’d like in an upward migration system like this one.I think Nature’s Footprint has pure Red Wigglers for only a few dollars more, they may worth looking into!Otherwise it’s just been a tough week of patience (not too good at that) as the worms work through the bedding and little food.Luckily we didn’t have the infamous “worm exodus” some first timers describe, maybe a few lost worms in the catch tray the first day or two.48hrs after they arrived and I settled them in, I uncovered the newspaper to add some crushed eggshells and a little coffee grounds (I froze the eggshells in a baggie and was able to easily crush them by just smooshing them in my hand).After the first week, I then added approx a pound of fruit/ veggie waste from my juicer. It was mostly beets, apples, and carrots. This was only 2 days ago, and I’ve just noticed a mild smell in the bin for the first time. Not a stinky smell, but slightly acidic (I think the high sugar and high moisture content, plus the large volume, caused a little mold buildup). I added more shredded paper and used the fork (I mean er I used the plastic sand toy *wink wink*) to mix up the new food, to introduce more air into the bin.So overall the perfect product for starters, and a great way to keep going even when you’re an expert- it comes with a total of 4 bins, and you buy more bins for a reasonable price here on Amazon.I’m excited to see how the worms do in a few months, we may try to feed them some of our autumn leaves once they’re churning quickly through the bins!!
Trustpilot
Hace 2 semanas
Hace 1 mes