🔧 Cut with confidence, adjust with ease — the only hole saw you’ll ever need!
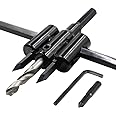
The Luomorgo Adjustable Hole Saw Circle Cutter is a versatile, durable tool designed for professional and DIY use. Featuring a cutting diameter range from 1 3/16" to 12", it handles multiple materials including wood, drywall, and plastic. Made from premium carbon steel, it offers long-lasting wear resistance and precision with an included drill bit and hex wrench for easy adjustments.


| Material | Carbon Steel |
| Cutting Diameter | 3E+1 Millimeters |
| Shank Type | Straight |
| Brand | Luomorgo |
| Tool Flute Type | Spiral |
| Minimum Bore Diameter | 1.31 Inches |
| Point Style | Center Point |
| Surface Recommendation | Plastic, Wood |
| Number of Flutes | 2 |
| UPC | 754021109371 |
| Unit Count | 1 Count |
| Manufacturer | Luomorgo |
| Number of Pieces | 1 |
| Part Number | HAOK20190100000261 |
| Item Weight | 3.53 ounces |
| Package Dimensions | 14 x 7.5 x 0.7 inches |
| Item model number | HAOK20190100000261 |
| Size | 1 3/16" to 12" |
| Color | Clear |
| Style | Adjustable,Round |
| Batteries Included? | No |
| Batteries Required? | No |
A**D
A really good circle cutter (if you use a drill-press) - no idea about its use "freehand"
I bought this circular hole cutter because I needed to drill several large holes in both 3/4" baltic birch plywood and white oak. Unfortunately I had mis-measured and this cutter was 1/4" too wide for my drill press so I had to return it and get the next smaller size. It worked very well but was too small for the 10.5" hole I needed so I ended up doing that one with my router - that actually worked better but even the palm router was too large for some of the smaller holes which this one did without a whimper.Other notes: Naturally I set my drill press to its slowest speed before using this toolThe Baltic birch ply cut without a problem - the 3/4" depth was no problem although I did cut it in multiple passes for obvious reasons.The white oak was just over 2" thick and had to be cut very slowly, and (as planned) I had to cut the holes there in multiple passes, and from both sides of the board. It also cut very accurately but I had to do more sanding in the 3" hole which I drilled there than the smaller holes in the oak or the ply.I like it, it works exactly as expected, and it held up nicely - I would definitely buy it again.Recommended to anyone needing a good drill-powered hole-saw. (a drill press is best for holes over about 1.5" (3cm+/-) in diameter)
F**7
Economical hole saw tool
I occasionally have a need to cut holes in wood of around 4" in diameter. Jig saws are not the answer, especially when the hole needs to be as perfectly round as possible. This tool enabled me to cut a near-death-Halloween perfect 4" round hole in 5/8" plywood.The product description shows the range of holes this tool can cut in "inches". But, the shaft diameter is shown in "millimeters". So - be ready to do some conversion.Also, the shaft on which the cutting blades are mounted was not tightly seated on the rotating shaft that will connect to the drill. There was about a 1/8" play, side to side, that couldn't be tightened. In the end, it didn't effect the tool's ability to cut a nice round hole. Centripetal forces balanced the side-to-side play on the mounting shaft when the drill was at cutting speed and while cutting.
E**S
You get what you pay for.
You get what you pay for with this. I ordered this to use at my church to cut holes to mount speakers in the ceiling. It is important to note that we are finishing up an extensive remodel that included a new ceiling. Checked the "star" rating and ordered this one. My first warning sign was that the parts in the package were loose in the packaging. My second warning sign was that the allen screws were EXTREMELY tight and took a lot of force to loosen to be able to move the cutting blades. I am not a weak guy so it should not have been that hard to loosen the screws. Once we got the screws loose it was equally as hard to tighten them so that the cutting blades would stay in place. Then came time for cutting the holes, which became my third warning sign, once we started cutting the holes the cutting blades moved and the holes got increasingly larger (did I mention that this was a new ceiling) which meant that we had to stop and use a saw to finish cutting that hole. For the next hole we tried taping the cutting blades in place but they still moved. End result was we used the hole saw to scribe a line and then used a manual sheetrock saw to cut the holes. Again, you get what you pay for.
T**N
Got it no probrem
Got it no probrem
H**O
Off by 10mm
Made of sturdy material. Markings are off by 10 mm. Be sure to measure with your own calipers or tape.
F**D
This Is A Great Tool (but use extreme caution)
This really is a great tool, contrary to the other reviews. YES, the markings on the bars are all metric, but nothing indicated otherwise. I used a tape measure to setup my diameters, and made sure everything was tight (a must). I am not sure how many holes I bored today, but it all was very easy and very quick (I mean literally, in a matter of seconds). I have not tried boring through wood... yet. I used a standard variable speed 20 volt drill (preferred and an impact will not work), and went to town. For sheet rock, I pre-drilled using a 3/16 bit and then, I used the tool with the chisel bit in it. It worked like a charm. I did check after every hole or every other hole, for tightness as a safety precaution. I am sure it will loosen up if you don't. Make sure the drill is at the lowest speed and start by SLOWLY scoring, keeping as even as you can. Once scored, I would increase the speed and, in a second or two, the hole was complete. I would say, yes, this would be for an advanced craftsman as it is not the easiest tool that anyone could use. I say to use extreme caution as parts could fly off if not keep tight, and you are not aware of the associated hazards: not keeping even or trying to go too fast. The tool will do the work efficiently and accurately. I am very glad I to have this in my tool arsenal.
D**S
On 1/2" sheetrock I got 3 of 6 holes cut cleanly. Was I using it incorrectly or not a good tool?
There are few practical instructions on the package. So I began by using a variable speed drill with a clutch, and the optional drillbit to start the pilot hole. The cut started out well, I managed to keep the assembly perpendicular to the ceiling, and the result was good. On the next hole the vibrations caused the pilot drill to enlarge the pilot hole, causing the end knives to begin making a bigger hole. So I stopped and finshed with a hand saw. For the next hole I swapped the drill bit for the other optional pointed centering tool. It is shorter than the bit so one must make sure you attach it with the tip exceeding the reach of the knives. This hole cut went better. I got a clean cut. The next one the same. But after that, even the pointed centering bit started to expand the centering hole that causes the knives to make the hole too big. So, in the end I got 3 good cuts and 3 where I had to stop before I the wobly center hole caused too big a hole. For lack of some directions, or information on what may have been causing my issues, my experience was dissapointing. I recommend the manufacturer post a web page with some practial information that first time users can utilize to understand how best to use the tool on various materials and what could be the cause for bad performance.
Trustpilot
Hace 2 semanas
Hace 4 días