🌬️ Elevate your air quality game!
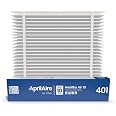
The Aprilaire 201 Replacement Furnace Filter is a high-efficiency MERV 10 air filter designed for AprilAire and Space-Gard 2200 or 2250 whole-house air purifiers. Measuring 20x25x6 inches, this filter effectively captures airborne particles, ensuring cleaner air in your home for up to one year. Manufactured in the USA, it represents a reliable choice for maintaining optimal indoor air quality.


B**B
Upgrade Kit: Why didn’t I do this sooner???
I used to wait until my son was home for the Holidays so I could get him to replace my Aprilaire 201 filter. I could do it myself and did for years but as I’ve gotten older it’s become more and more of a challenge.With the old setup I had to haul the nasty “suitcase” style holder into the house and work on it on our dining room table. Those little combs and the little fold over cardboard ears that would always tear were an exercise in frustration.I finally decided to try this upgrade kit due to the Summer Wildfires we have here requiring a filter change earlier than usual. I am SO glad I did! It was super easy to snap together and slide into the existing housing in place of the giant plastic suitcase which I tossed in the dumpster.Tip: You want the female (inverted) side of the channels on the frame rails facing outward so they can slide over the square shaped rails on the sides of the filter housing. Once you get that right the rest is easy. The skinny metal pieces just snap into the 4 slots on the two end pieces.Note: They do NOT slide all the way in and stick out about half an inch above and below the two end pieces. This confused me a bit but it’s there in the drawing on the instructions if you look closely.After that you simply unbox the supplied filter, point the arrows on the outside towards the furnace and slide the two plastic end pieces into the channels on on the new frame, push it all the way in, and that’s basically it.Notes on snap in filter door: Our filter came from Lennox but it’s basically a rebadged 2200. My door didn’t need the styrofoam piece but it DID need a new foam gasket. The old one had basically deteriorated to the point of being a disgusting viscous black Goo that I had to scrape off with a razor blade and then use solvent to remove the sticky residue.Tip: I replaced the old foam weatherstrip with a 3/4” x 3/4” RUBBER “D Shaped “ door seal gasket (like the ones found inside your car door) that I purchased here on Amazon. This is a HUGE upgrade since the original foam type will after a very short while shrink down and no longer seal the outside air from leaking in. A few years after that they decompose completely and turn into the afore mentioned sticky “black goo” that took me almost an hour to remove.Rubber door seal gaskets will remain intact indefinitely. The original foam ones had shrunk down to less than half inch and were basically doing NOTHING and you could hear the air whistling around the edges of the filter door, so it is well worth the trouble to replace them. This is a one time fix and the cost for the Rubber ones is about the same as the foam ones.FYI: If you still have questions there are several videos on YouTube showing precisely how this upgrade kit goes together and fits into the Air Filter housing.To sum up, I couldn’t be happier I took the plunge and even happier to never have to deal with the old Suitcase style system again! It’ll be nice to be able to change the filter myself in a matter of minutes at the furnace rather than having to drag the whole filter assembly into the house. I highly recommend doing it. Takes less time to install the upgrade kit and new filter than it used to take to replace the old style 201 filter that it replaced.Better filtration, way easier to install, and now I have options to use modern higher rated filters that can be purchased in bulk and delivered to my door. What’s not to like? If you are as sick of dealing with the old system as I was then this is the upgrade you’re looking for! 🤗
A**R
Great Upgrade for the Price—Improved Air Quality and Performance
My Space-Gard 2200 cabinet didn’t have an inner housing, so I picked up this upgrade kit. It installed easily and fit perfectly. The included MERV 13 filter has made a noticeable difference -- less dust, better humidity control, improved airflow (compared to the previous setup), and even a surprising boost in the overall smell of the house. For the price, it’s a fantastic upgrade if you're looking to get more out of your existing system.
V**D
Nice upgrade.
Works as advertised. Easy ro install. Easy to follow instructions.
T**I
AprilAire HVAC filter
This item just arrived over the weekend. It shipped fine and was intact. It is exactly as advertised. TP
J**E
Correct replacement
As advertised and expected, fit my furnace.
N**P
Great replacement filter
Fits perfectly in my Space Gard filter and the ribbon holding pleats makes installation so much easier.
G**Y
Air filters
Good dependable
D**Y
Like it, a bit tricky
I have been remiss in taking care of the filtration of my home. Mainly this is because I have to go into the crawlspace and I had done it a while back, but it must’ve been several years ago. Got tired of sneezing like crazy, not knowing what was going on. in and remove the big plastic casing in the filter, which was filthy, of course. Since it was in really bad shape, I went online and found this replacement. It arrived quite quickly, and when it came, I looked at the box with diagrams and instructions, and it was just a bit confusing. I put the frame together after trying to figure out the orientation of the pieces and whether they were upside down or not. I wish the pictures were clear but trial and error allowed me to finally put the frame together then I loaded in the filter. Then I decided to look at a video online. I realize that what he did was installed the frame first and then slid the filtration , inside of the frame once the frame is installed. So I remove the filtration crawled under the crawlspace with the frame, and the filtration and manage finally to get the frame in. I found it difficult to orient and properly install the filtration, but I finally managed to do it. Let it be noted that I was on my belly with very limited space between the ground and the floor joists above so that really accounts for my difficulty. The Styrofoam door seal is a little different on each side so I figured out how to orient it while in the crawlspace. Then to my surprise, I see a little filter slide in holder and I realize that there’s a second filter that I need to replace. Fortunately I had some in the house. Now the good thing is I only have to order the filtration accordion type of thing here after. Live and learn and I’ve been way too casual on approaching filtration and I’ve learned my lesson big time. I do recommend this product.
Trustpilot
1 week ago
3 weeks ago