⏳ Stay ahead of engine wear—track, maintain, and conquer every hour!
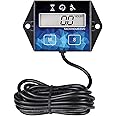
The Runleader Small Engine Hour Meter (model RL-HM011F) is a compact, durable digital tachometer and hour meter designed for ZTR lawn mowers, tractors, generators, marine outboards, and ATVs. Featuring 0.1-hour accuracy, programmable maintenance reminders, and a replaceable CR2450 battery that retains data, it ensures precise engine monitoring and timely servicing. With an IP65 waterproof rating and easy installation, this device is engineered for reliability and longevity, backed by CE and RoHS certifications and a 2-year warranty.


| Brand | Runleader |
| Material | Acrylonitrile Butadiene Styrene (ABS) |
| Item dimensions L x W x H | 2.89 x 1.85 x 0.79 inches |
| Item Weight | 80 Grams |
| Screen Size | 47 Millimeters |
| UPC | 713721649044 |
| Manufacturer | Ningbo Jiangbei Run Leader Electronics Co., Ltd |
| Item Weight | 2.82 ounces |
| Product Dimensions | 2.89 x 1.85 x 0.79 inches |
| Country of Origin | China |
| Item model number | RL-HM011F |
| Batteries | 1 Lithium Metal batteries required. (included) |
| Is Discontinued By Manufacturer | No |
| Manufacturer Part Number | RL-HM011F |
R**.
Effective, inexpensive and simple to install and use.
I was a bit hesitant to purchase these tacho/hour/maintenance reminder meters. I felt there was too much functionality for how they are priced. However, I really got tired to taking a stab in the dark as to when maintenance was required for my small engines on my portable generator and power reel mower. Now that they are installed I absolutely would not give them up - even if you're just looking at the engine speed.Setup: I used the adhesive backed hook and loop mounting arrangement that was supplied with the units. I didn't feel like drilling and tapping two small holes for the meter so I took the easier route. I cleaned the back of the meter with a pre-soaked (no alcohol - just soapy grease cutter version) shop towel and attached the fabric with the battery access cutout. It's 3M adhesive on the hook and loop so it's not coming off anytime soon. The coin-cell battery is preinstalled but you have to unscrew the cover and remove the isolator (a piece of plastic) so the battery makes contact with the tabs on the circuit board. No different than replacing a coin battery for any other device except the packaged versions have a sticker you have to remove. Once it shows that it's on your ready to program.Programming: I didn't have to make any changes to the presets but don't assume you won't. It all depends on your engine and the instructions are pretty clear on how to cycle through the steps. I did play around with it a bit just so I don't have to pull out the instructions that I will eventually misplace or lose. But, take your time and you will be rewarded on the first try.Installation: I cleaned off a spot on my equipment and placed the other part of the hook and loop on an area where I could get to the unit without performing any acrobatics and unfolded the spark plug cable (you can use two methods for sensing the spark - I won't go into details here because it's clear in the instructions). I decided to use the "wrap around the spark plug cable method" because I didn't want to d**k around with the ignition coil. My method was to zip tie the meter cable to the housing part of the spark plug wire (the part that attaches to the plug) and then make 5 turns around the cable then zip tie the trailing end of the meter wire to the spark plug cable. Make sure your turns are tight around the spark plug cable and bunched together in one layer - take your time because making sure the induction lead (meter cable) is wound tightly is important. With a pair of diagonal cutters or very sharp scissors cutoff all but 2-3" of the trailing meter lead (just in case you have to redo it and need a little extra in the future.Operation: Nothing to it here. Once I started the engines the unit automatically started reading the speed in RPM - kinda nice to see when you haven't seen it before - it's the small things that excite me. I checked my instruction manual and the meter indicated what the manual stated - give or take a few RPMs but nothing major. For example, full speed on my generator engine is 3600 RPM. The meter was reading 3590 - 3610 RPMs. I consider that a success.Cleanup: I placed some zip tie bases in a couple of spots so the meter lead would stay clear from the hottest part of the engine. But, keep in mind it is an air cooled small engine (speaking only for my two) after all and they are built tightly with only a bit of space in order for the internal vanes to push air over and around the engine.In Closing: Nothing major to discuss here but keep in mind the following: 1. Take your time (it took me roughly 30 minutes for the first one and no more than 15 minutes for the second install), 2. If you know the characteristics of your engine program the meter prior to installing it, 3. If you can avoid it try to keep the actual meter away from the hottest parts of the engine, 4. Make sure your meter lead is tightly bunched and wound, in one layer, around the spark plug cable, 5. Start your engine and enjoy the view, and lastly, 6. Go enjoy a cold, frosty beverage - mine is 60% Simply Lemonade and 40% Gold Peak sweet tea - my version of an Arnold Palmer.
H**I
vey handy item
RUNLEADER Small Engine Hour Meter – A Must-Have for Every Small Engine!Wow—what an awesome little device! The RUNLEADER hour meter was an absolute breeze to install and works flawlessly right out of the box. This thing is a game-changer for anyone who wants to keep their small engines in peak condition.The maintenance setup is brilliant—it tracks your oil changes and other service needs with ease and even flashes to remind you when it's time for action. No more second-guessing or missed maintenance intervals. It takes all the guesswork out of the equation!But the real star? The built-in tachometer! Being able to monitor your RPMs means you can dial in performance and make sure your engine is running at peak efficiency and within safe limits. It’s an awesome feature, and for best results, I highly recommend double-checking the RPM readings against a certified meter during setup to fine-tune accuracy.I honestly couldn’t be more thrilled with this product. The install was quick, the display is clear, and the features are just what every small engine needs. I’ll be grabbing more of these for all my tools around the shop.Highly recommended—don’t think twice, just get it!
U**S
The unexplainable way to wrap the wire around the spark plug wire for consistent rpm readings
Seems to work okay. The instructions leave a lot to be desired. It's hilarious that the instructions suggest to add or reduce wraps around the spark plug wire in order to get the rpms on this gauge correct. It's like, I'm buying a tech because I don't know what the rpms are!Anyways, I struggled to get this installed and reading "correctly." It was installed on a tach-less 4 stroke fuel injected outboard boat engine. I knew the rpms should be around 725 in gear -- presumably in water. Out of water, the rpms should read a touch higher I'd imagine. One way I installed the inducer wire on this gauge had it reading 400ish. Okay, more wraps. A couple more wraps and it's reading 1200. Less wraps. Finally, it settled around 900. Turn the engine off, fire it back up, it's now 600. Wtf. I searched Google and YouTube for answers and it's hilarious how many people have these tachs installed and they're clearly reading the wrong RPMs. The chainsaw idling at 6000 RPMs? Yeah, it's wrong buddy. And worse, no one seemed to show how to wrap the inducer pickup wire around the spark plug wire. I was trying to start with the end of the wire and begin wrapping from there. I think that's where my troubles started. I ended up finding a completely unrelated short of a guy installing a tach-less hour meter on his dirt bike and how he did the wire is how I ended up doing mine. Pic related. I kept a long tag end. 5 wraps around the spark plug wire and pulled tight back onto itself. This seemed to provide the best and most consistent rpm reading. If the thing auto-off'd I'd give it 5 stars.
B**D
Easy and cheap.
Easy to install and work pretty good for the money. I've order six (2 packs) and have them on multiple outboards and given them to a few of my friends.
M**N
Works good
Works good on 212 just need to put it in 2 stroke mode to read right even tho it’s a 4 stroke other then that it’s perfect
R**H
Very nice meter that worked as advertised.
My TORO with a B&S engine wasn't picking up grass clippings like it should. I replaced the stock blade with an OEM high lift one and it helped but I still wasn't getting the even cut I wanted. I have fescue that I keep at 4 inches here in NC. I went to several sites and the answer I kept coming up with was that the RPM were set too low from the factory. The spec is 3250 + or - 150 . I started the mower up and it was running at 2800, so I adjusted the RPMs to 3300 which was very easy to do! What a difference increasing the RPMs by 500 made. My grass in even and the bag was FULL of clippings. About the meter, it worked, was easy to program and it was very reasonably priced.
C**G
Rpm
Can’t get it to read the rpm for single cylinder 4 cycles
Trustpilot
1 day ago
1 month ago