✨ Elevate your garage game with a gloss that lasts! 🛠️
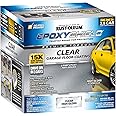
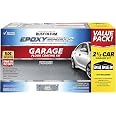
Rust-Oleum 292514 EPOXYSHIELD Premium Clear Garage Floor Coating Kit delivers a professional-grade, high-gloss epoxy finish designed for interior concrete surfaces. Its 100% solids formula ensures superior durability, chemical resistance, and protection against hot tire pickup. Covering up to 500 sq.ft. on painted floors, this low odor, low VOC coating is walk-ready in 24 hours and vehicle-ready in 72, making it the ultimate upgrade for garages, basements, and workshops.


| Brand | Rust-Oleum |
| Specific Uses For Product | Interior |
| Material | Liquid |
| Item Form | Liquid |
| Special Feature | Low odor |
| Color | Clear |
| Item Package Quantity | 1 |
| Package Information | burst pouch |
| Item Volume | 90 Fluid Ounces |
| Full Cure Time | 72 Hours |
| Water Resistance Level | Waterproof |
| Unit Count | 90.0 Fluid Ounces |
| UPC | 020066308827 |
| Global Trade Identification Number | 00020066308827 |
| Manufacturer | Rust-Oleum |
| Part Number | 292514 |
| Item Weight | 7.15 pounds |
| Product Dimensions | 8 x 8 x 9.5 inches |
| Item model number | 292514 |
| Is Discontinued By Manufacturer | No |
| Size | 2.5 Car (Pack of 1) |
| Finish | High Gloss |
| Pattern | Premium Clear Topcoat |
| Coverage | 500 sq.ft. on painted surfaces, 250 sq.ft. on bare concrete |
| Special Features | Low odor |
| Included Components | Painting Supplies; Caulk & Sealants; contact-cements |
| Batteries Included? | No |
| Batteries Required? | No |
| Warranty Description | Warranty |
Trustpilot
Hace 4 días
Hace 1 semana