🌊 Dive into the Blue: Capture Timeless Moments with JacquardCyanotype!
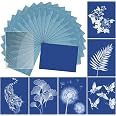
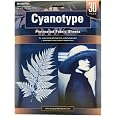
The JacquardCyanotype Sensitizer Set is a complete kit designed for enthusiasts of the ancient cyanotype photographic process. It includes premeasured chemicals and instructions, allowing you to create stunning Prussian blue prints on any natural fiber. With enough sensitizer to produce approximately sixty-five 8”x10” prints, this set is perfect for both beginners and seasoned artists looking to explore the beauty of monochromatic photography.
Item Volume | 50 Milliliters |
Unit Count | 2.7 Fl Oz |
Size | 2.7 Fl Oz (Pack of 1) |
Finish Types | Matte |
Color | Clear |
Additional Features | Fade Resistant |
K**T
Works Great! Easy and Cheap!
I bought some cheap multimedia/watercolor paper and used a brush to coat. I've used it to treat a couple hundred 8.5 x 11 sheets and I still have some left in the bottles. I wish I had tracked this better, but I think this will coat 300-500 8.5 x 11 sheets (way more than the bottle indicates). The results are great: very consistent and vivid. After prepping (about two hours of work) I made prints with 40 kindergartners and 8 adults in about 30 minutes, and everyone was pleased with the results.1) I added water per instructions and fully dissolved the solids inside the bottles. I made a test example immediately after this and it worked fine, but the instructions advise to wait a day. I continued using the bottles for about a month and kept getting good results.2) I covered a large work area in cheap plastic drop cloth. I was working with the blinds down, which left it bright enough to see. The less natural (UV) light, the better. However, I was able to work with regular indoor lights on while I did the coating and it seemed to work fine.3) I combined a small amount of the solutions per the instructions. I used a digital scale to get equal amounts in a paper cup or bowl and used immediately. I would recommend mixing a tablespoon of each at first. This should coat 10-20 sheets of paper pretty easily, or perhaps a 5x5 area of cotton fabric. Mix only what you need. I didn't test how long the mixed solution could be left, but I think this should be done same-day.4) Using a 3 inch foam brush, I coated several sheets of cheap 8.5x11 mixed-media/watercolor paper. It's about $5/60 sheets at hobby stores. I didn't price it online. The important thing is to completely cover the pages, but it doesn't need to be heavy or dripping.5) I left the lights off while the paper dried for most of an afternoon.6) I cut the paper down and stored it in manilla envelopes with a couple of extra sheets of construction paper to block out light. I don't know how long it will keep this way, but it works fine for at least 4 weeks.7) I used glass from the hardware store and cut it ($8 tool) and taped the edges with duct tape. A 10x12 sheet of glass doesn't require cutting and costs about $5. A much bigger sheet can be cut into quarter-sheet sized pieces for about $1 each. Your willingness to work with glass and the size you want to use will determine the cost. The glass serves two important purposes: a) It keeps everything from blowing away. Even a little shifting will ruin the exposure. b) It keeps the objects flat against the cyano paper, giving a nice sharp silhouette and delicate details. Think of the shadow your hand makes when it is directly next to the ground or a wall, and then how fuzzy that shadow gets as you move your hand farther away. That sharpness of focus is the principle at work here.8) I did this with kids using 4.25x5.5 quarter sheets, so I will describe that process. I folded a piece of heavy, dark paper and placed the cyano sheet inside and put masking tape on the outside. We had no trouble working briefly in the shade. However, these sheets can't be left outside in the shade for more than a few minutes or they will start to develop. Keep them in something like a folder before exposing. Kids wrote their names on the back (white) of the cyano sheet and the masking tape of the folder.9) Kids collected their nature objects and opened their folder in the shade to arrange them on their cyano sheet. Kids were given a plate of glass to make a "sandwich:" cyano paper on bottom, nature objects next, glass on top, everything in the folder held careful and flat.10) Once everything was arranged, the folder was moved to a sunny area and opened up to expose the cyano paper. I would stand with my shadow over it at first while I made any necessary quick adjustments and then moved everyone away for the exposure time. Bumping into the paper could be disastrous.11) The paper can be exposed for about 3.5 minutes on a sunny day. On cotton cloth, 6 minutes seemed like a better length of time for photographic exposures. Using a black light inside, it needs to be just a few feet away for 10-15 minutes (if it washes out later, it was underexposed).12) Once the time was up, we quickly stuck the papers back in the folder to stop the exposure and be ready to wash.13) I used vinyl gloves when rinsing large projects, but I didn't get any stains just rinsing single sheets by hand. This should be done in the shade/artificial light, not in the sun. My advice is to get a paper plate or disposable baking pan filled with water and let the sheet soak and change the water 4-6 times over 2-3 minutes. For a large group project, create a line of 6 pans and run sheets through the pans 3 at a time for about 30 seconds each, shuffling them down the line in small batches. You can rinse 40 sheets in less than 10 minutes this way. Near the end of the washing process, use a small amount (a drop on a plate of water or a few drops in a pan) of hydrogen peroxide and watch the picture turn dark blue. Then rinse the peroxide water out in the final wash. The end result should be fairly stark deep blue and bright white. If the white looks ivory or yellow, it can probably be soaked/rinsed a little longer. If the blue is faded, it probably should have been exposed longer. I've also done this on smoothly sanded wood and left to soak/rinse for 10-20 minutes with good results.14) The best way to dry the paper is hanging from a string with clothespins or letting as much water as possible drip off and then lying flat on a paper towel. DO NOT place a paper towel on top of the cyano paper. The color tends to leach/bleach during drying this way. I left mine in the sun to dry without ill effects.
M**G
An easy way to make your own cyanotypes
These are great and make it easy to create your own cyanotypes. You just add water to the two bottles. When you are ready to use the solutions, you mix them together and brush the emulsion onto the surface you want to use in the dark with a safelight. I do mine in a bathroom without a window. I brush the emulsion onto watercolor paper, dry it using a hair dryer, and then store the sheets in a tightly closed box until I use them. The only unfortunate thing is that you can't really tell if/when the powder in the bottles is dissolved - but there's nothing to be done about it since the chemicals are light sensitive and to look would be to ruin them...
F**T
Cyanotype Processing Chemicals
Worked great for my friend's cyanotype art project.
D**N
Easy to use and a great value for making sun prints
I've been really happy with these cyanotype solutions. Just mix equal amounts of each solution (I used 1/8 cup each and made 50 4X6 prints) and brush on paper or fabric in a fairly dark room. I had a hallway light on but was in a room with the lights off and door just cracked. Ahead of time I taped watercolor paper onto cardboard so that the paper would lie flat to dry in the dark. It dried overnight and I used it the next day. The color was a beautiful, deep blue with good detail after exposure to a full spectrum lamp for 15 minutes. I had to use the lamp since the project was done in the rainy cold winter after dark. In the summer sun, the exposure is 1-2 minutes. A couple years later, I mixed more solution from the same bottles and it still worked perfectly.
R**R
It's the Best
This cyanotype sensitizer set by Jacquard is the best. It's my go-to and the one I will continue to recommend to others, too.
B**.
Great for Cyanotype Projects but Lacks Safety Precautions
I recently tried the Jacquard Cyanotype Sensitizer Set, and it’s been an exciting addition to my creative projects. The kit itself is well-packaged and comes with everything needed to start making stunning blue prints, more than once. The instructions included are clear, making it easy for beginners like me to jump into the process and achieve impressive results.However, after purchasing, I discovered that the chemicals used in the sensitizer can be toxic to handle. While the product works wonderfully, I believe it should come with more explicit safety instructions regarding handling, disposal, and the use of gloves. Including protective gloves in the kit would make it safer for first-time users and ensure they’re properly protected when mixing and applying the chemicals. Disposal instructions would also be beneficial, as it’s not always clear how to safely get rid of any leftover solution without harming the environment. This would add a layer of responsibility and safety to the overall experience.
H**
Quality
SIze/tamaño, Quality/calidad, all you are looking for cyanotype
E**H
What worked for me!!!!
This is what worked for me: mixed the solution and let it sit overnight, the next day I grabbed the hoodie I was going to print on and used one of those foam paint brushes to soak the section I needed (PS if you think you've put enough solution on you haven't), then I set it hanging in my closet until dry (it will drip so put something underneath it!!!) which took about a day, then place your negative on top in direct sunlight and let it expose for about 20 minutes or until it looks a rust color, finally go into the bath or shower and put some cold water mixed with a bit of hydrogen peroxide and slowly rinse it out. At the end of this you can either let it dry by hanging up or I put mine in the wash (no detergent no soap) and let it run a cycle and then put it in the dryer. Good luck to all of you I hope this helps some frustration!
Trustpilot
Hace 1 día
Hace 2 semanas