🚀 Elevate Your Programming Game!
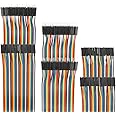
The KeeYees Downloader Programmer is a versatile tool designed for 3.3V and 5V microcontrollers, featuring a user-friendly USB interface, automatic speed regulation, and an included 10PIN to 6PIN adapter for seamless programming experiences.
C**S
They work!!
Can’t speak for other suppliers programmers but these work very well with Aatiny chips.Ease of use is a real asset. Download the correct driver and start programming.
B**E
Beware of the high memory glitch !
My boards worked right out of the box and had the 1.04 firmware. I was programming UNO's right and left.But I hit a glitch when I tried to program a Mega2560. It seems to work fine under the Arduino IDE but loading a big program (FlashForth) with avrdude was a total failure.It seems there is a firmware glitch in the 1.04 firmware for memory > 128K. After 2 days of effort I found an excellent website that explained the glitch and had a revised firmware 1.05. I flashed one of my usbasp's , uploaded Flashforth to my Mega2560, and it worked flawlessly!I don't know if I can put a website address here, but search for "Mega2560 usbasp mystery" and you will find it.On a side note, I see different jumper numbers on the reviews from the boards I got. Next to the 3.3V/5V 3 pin jumper is a 2 pin jumper labeled JP1. This is the pin I needed to short in order to program the usbasp module. Sitting by itself on the other side is a jumper without pins labeled JP3. I think this is the sck jumper but I have not needed to use it for anything. I would upload a picture, but I have a new Mega2560 FlashForth computer to play with right now!
H**E
Works well with AVRDude
Both boards work as expected. The boards I received had outdated firmware, but it was easy to solder a jumper at JP2, and upgrade to the latest firmware (from 2011!) using AVRDude. Use one device to update the other, then swap JP2 from one board to the other, and update the second board as well.
J**0
Upgraded to the latest firmware, worked perfectly for my needs after that
The product came sealed in individual static bags per part. Unfortunately, it was shipped in a rather soft envelope, which didn't provide much protection. Lately I've had several packages shipped this way that were damaged in transit. In this case, I got lucky! No damage.Flux was generously applied, and not removed from the smaller boards, but is easy to do gently with some rubbing alcohol. Do this first, as it's sticky stuff, and can make a mess.Some connectors are at minor angles, but everything was soldered solidly and fully functional.When going to use your programmer, you may see the following message.avrdude: set SCK frequency to 500 Hzavrdude: warning: cannot set sck period. please check for usbasp firmware update.To upgrade the firmware, you will need to first populate JP3 and JP2. Attached image shows my board, with those two jumpers populated. If you don't have the ability to solder on the jumpers, a wire, or clip can be used as it will only need to be there for a few minutes during the upgrade process. Just make sure you have a solid connection.JP2 will enable “ISP self-programming”JP3 will enable “Slow-SCK”These both need to be jumped on **the device that you are upgrading** they do not need to be jumped on the other device.I then used one programmer to program the other, and then reconfigured and did the same process a second time, to have two fully up to date devices.I used avrdude on windows. Drop the default avrdude.conf and firmware file into the same directory as avrdude if you want to reuse this line as-is. avrdude is included with the arduino ide application, so if you have that installed, you already have it on your machine.avrdude -C avrdude.conf -p atmega8 -c usbasp -U "flash:w:usbasp.atmega8.2011-05-28.hex:i" -F -P usbThe next time I used the device, the warning was gone. I programmed an atmega328p successfully with several different sketches, and changed out a bootloader on another arduino board to test it out. Everything worked as expected!
F**M
Works Great
These are really nice for programming microchips (for me ATMEGAs and ATTINYs) without having to put the ArduinoISP sketch on the Arduino, upload the code to the microchip, then upload a new program to the Arduino. I am not sure if this is normally the case with USBASPs, but this one does not show up as a serial port on Arduino. The Arduino IDE still uploads to it just fine. However, if there is a connection issue between the USBASP and the microchip, the Arduino IDE will say that there is nothing plugged into my computer. If I use an Arduino as a programmer instead, I get en error like "avrdude: yikes! Invalid device signature: 0xFFFF [or 0x0000]".
B**N
EVERYTHING I Needed. Worked great
I needed to flash update one of the new little ATS-20 multi-band receivers. The programmer, cable, and 6 pin adapter provided all the hardware I needed to smoothly accomplish the project. No hidden issues.
S**R
Works as promised
Fast shipping , Works as promised
M**S
Well manufactured but..
This USBasp is very well manufactured but it doesn’t work right out of the box for all applications. It needs two additional jumpers soldered on in order to select a lower clock speed for certain target boards., and for resetting the EEPROM chip so that its firmware can be updated. Without these modifications (for which I just had to order the required parts) it triggers error messages in the Arduino board manager software.So it will be a long process before this simple part is able to perform its job. Needless to say it took of course substantial time to test and research everything,
Trustpilot
Hace 1 mes
Hace 3 semanas